
Shooting in full sun is challenging because the light is bright, hard, and contrasty. Highlights can blow out quickly, shadows can turn black, and people often squint or get harsh shadows under their eyes. The solution is not one magic camera setting. It is a simple field workflow: control exposure, choose a better light direction, check your highlights, and soften or redirect the light when needed.
For most beginners, start with a low ISO, a fast shutter speed, and an aperture that matches your creative goal. Then use exposure compensation, your histogram, shade, reflectors, or fill flash to manage the harsh contrast. Full sun can look clean, sharp, and vibrant when you stop fighting the light and start positioning your subject with purpose.
Quick Answer
The main takeaway: when shooting in full sun, expose for the highlights and manage the shadows. Bright sunlight gives you plenty of light, so your camera can use low ISO and fast shutter speeds. The problem is not lack of light; it is too much contrast.
A good starting point for full-sun photography is:
| Situation | Starting Settings | What to Watch |
|---|---|---|
| — | —: | — |
| Portrait in harsh sun | ISO 100, f/2.8–f/5.6, 1/1000s or faster | Blown skin highlights, squinting, dark eye shadows |
| Landscape or travel scene | ISO 100, f/8–f/11, 1/250s–1/500s | Bright sky clipping, deep foreground shadows |
| Beach or snow photos | ISO 100, f/8, 1/500s+ | Camera underexposure from bright surroundings |
| Street or action | ISO 100–400, f/5.6–f/8, 1/1000s+ | Harsh shadow patterns, missed focus |
| Close-up subject | ISO 100, f/4–f/8, 1/500s+ | Shiny reflections and blocked shadows |
Use Aperture Priority if you want speed and simplicity. Set your aperture, keep ISO low, and let the camera choose shutter speed. Then adjust exposure compensation if the image is too bright or too dark. Use Manual mode if the light is consistent and you want every frame to match.
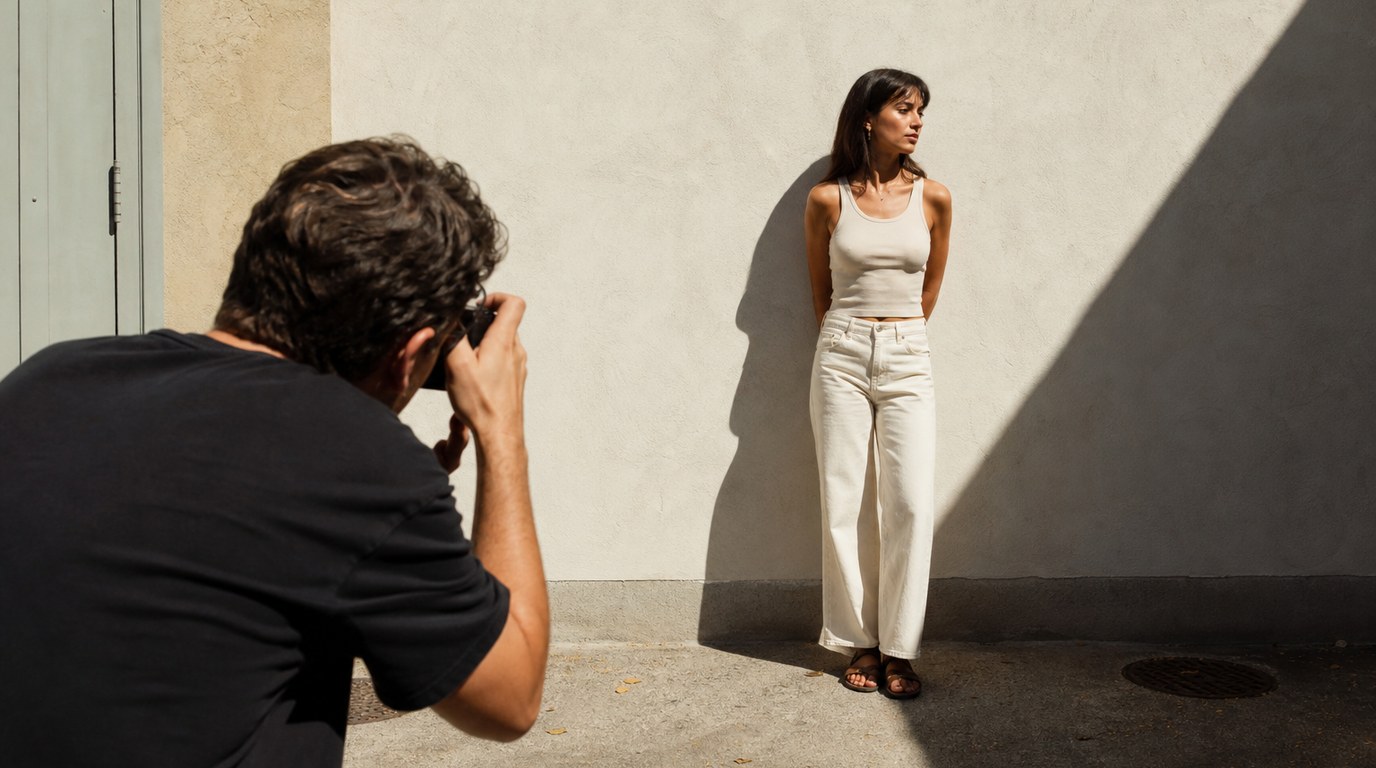
For people, avoid having them face directly into the sun. Turn them so the sun is behind or to the side, then expose for the face. If the face becomes too dark, add fill flash, use a reflector, or move into open shade. For scenes, check the histogram and protect important highlights, especially clouds, white clothing, water, sand, and pale skin.
How to Think About This Topic
Full sun is not automatically bad light. It is simply hard light. Hard light comes from a small, direct source relative to the subject. On a clear day, the sun creates crisp shadow edges, bright highlights, and strong contrast. That can look dramatic and graphic, but it can also make portraits unflattering and scenes difficult to expose.
The key mental model is this: your camera has less dynamic range than your eyes. When you stand outside at noon, your eyes and brain adjust as you look from a bright sky to a shaded face. A camera records everything in one exposure. If the sky, white shirt, or shiny forehead is much brighter than the shadows, something may lose detail.
That is why shooting in full sun is mostly about deciding what matters most. If the subject’s face matters, expose for the face and control the background if possible. If the sky matters, expose to keep cloud detail and accept darker shadows. If the scene has reflective water, bright pavement, or sand, expect the meter to be fooled.
Camera meters try to turn the scene into an average brightness. In full sun, that can cause two common problems. First, bright backgrounds may make the camera darken the whole image, leaving people underexposed. This happens often at beaches, snowy locations, or white concrete areas. Second, if you meter from a shadowed subject, the camera may brighten the frame too much and blow out the sky.
Light direction matters as much as settings. Front light, where the sun is behind you and shining straight onto the subject, gives strong color and simple exposure, but it can cause squinting and flat-looking faces. Side light creates shape and texture, but it can make one side of a face too dark. Backlight can look beautiful because it keeps the sun out of the subject’s eyes and creates rim light, but the face often needs extra exposure or fill.
Your job is to reduce the gap between highlights and shadows, or to use that gap intentionally. You can reduce contrast by moving the subject into open shade, using a diffuser, adding fill flash, or bouncing light with a reflector. You can use contrast creatively by photographing silhouettes, strong architectural shadows, street scenes, sports, or patterns on walls and pavement.
The beginner-friendly way to think about full sun is: first choose the important detail, then place the subject, then set exposure, then check the result. Do not rely only on the rear screen, because bright outdoor conditions can make the image look darker or brighter than it really is. Use the histogram, highlight warning, or exposure preview when available.
Practical Guidance
Start by setting ISO as low as possible, usually ISO 100 or 200. Full sun is bright, so higher ISO is rarely needed unless you are using a very fast shutter speed for action or your camera’s base ISO is higher. Low ISO helps preserve detail and keeps highlights cleaner.
Next, choose aperture based on the look you want. For portraits with background blur, try f/2.8 to f/5.6, but remember that wide apertures in full sun may force extremely fast shutter speeds. If your shutter speed hits the camera’s limit, use a lower ISO if possible or add an ND filter. For landscapes, travel photos, or group shots, f/8 to f/11 is a reliable range because it gives more depth of field and sharpness.
Choose shutter speed based on motion and exposure. For still subjects, 1/250s or 1/500s often works. For kids running, sports, pets, or street action, start around 1/1000s. In bright sun, fast shutter speeds are easy to reach, which is one advantage of harsh midday light.
Check exposure carefully. Turn on highlight alerts if your camera has them. If important bright areas blink, lower exposure slightly. Use the histogram as a guide: a graph pushed hard against the right edge usually means clipped highlights. Some clipping is acceptable in tiny specular reflections, such as sparkles on water or metal, but not on faces, wedding dresses, clouds, or product details.
For portraits, position the person before changing every setting. Avoid direct overhead sun when possible because it creates dark eye sockets and bright noses and foreheads. If you must shoot at midday, look for open shade under a building edge, tree, awning, or doorway. Open shade means the subject is shaded but still facing a bright open area, so the light is softer and cleaner.
If there is no shade, turn the subject so the sun is behind them or slightly behind to one side. This prevents squinting and creates a nice rim of light around hair or shoulders. Then expose for the face. The background may become bright, so watch for clipping. A small reflector, white wall, pale sidewalk, or fill flash can lift the shadows on the face.
For beach or family photos, be careful with sand and water. These surfaces reflect a lot of light and can confuse your meter. If faces look too dark, add positive exposure compensation, such as +0.3 to +1.0, while watching that skin does not blow out. Sunglasses, hats, and white shirts can also create exposure issues, so take a test shot and zoom in.
For street photography, full sun can be a creative tool. Look for sharp shadow lines, bright walls, silhouettes, and people walking through patches of light. Instead of trying to make everything evenly lit, expose for the bright area and let shadows go dark. This can produce clean, graphic images with strong contrast.
For close-ups of flowers, food, products, or small details, harsh sun often creates shiny spots and blocked shadows. Use your body, a hat, a white card, or a small diffuser to soften the light. Even a thin piece of translucent material between the sun and subject can make the photo look more controlled.
A simple field workflow is: set ISO low, choose aperture, take a test shot, check highlights, adjust exposure compensation or shutter speed, then fix the light direction. If the image still looks harsh, move to shade, add fill, or use the contrast intentionally rather than forcing a soft-light look.
FAQ
What Should a Beginner Know First About Shooting in Full Sun?
A beginner should know that full sun is mainly a contrast problem, not a brightness problem. Start with low ISO, choose an aperture for your subject, and protect highlights. Then improve the light by changing subject position, using shade, or adding fill.
What Matters Most When Evaluating Shooting in Full Sun?
The most important things are highlight detail, shadow depth, and light direction. Check whether skin, clouds, sand, or white clothing are blown out. Then look at the shadows on your subject. Good settings help, but positioning often fixes the biggest problems.
What Mistakes Should Readers Avoid with Shooting in Full Sun?
Avoid making people stare directly into the sun, ignoring blown highlights, and trusting only the rear screen. Also avoid fixing every problem with exposure alone. If the light is unflattering, move the subject, change the angle, use open shade, or add fill.
What Is the Next Logical Step After Learning About Shooting in Full Sun?
Practice with one subject in several light directions: front light, side light, backlight, and open shade. Use the same ISO and aperture, adjust exposure, and compare the results. This teaches you faster than memorizing settings because you see how sunlight changes the photo.