Fruit and vegetables are excellent subjects for a beginner still life assignment because they are colorful, affordable, easy to arrange, and full of texture. Your goal is not just to “take a picture of produce,” but to make a deliberate photograph using light, composition, background, and camera settings.
For this photographing fruit and vegies new assignment, choose a small group of produce, place it near simple light, build the scene slowly, and shoot several variations. Start with one clear idea: fresh and bright, dark and dramatic, rustic kitchen, colorful pattern, or close-up texture. Then refine the frame until every object has a reason to be there.
Your Assignment: Create a Fruit and Vegetable Still Life
Your assignment is to create one finished still life photograph using fruit, vegetables, or a mix of both. The final image should show intentional choices in subject, light, composition, and background.
Keep the setup simple. Use three to seven pieces of produce, one surface, one background, and one main light source. You can shoot on a table, kitchen counter, windowsill, floor, or tray. The challenge is to make ordinary food look carefully observed.
Before shooting, decide the mood: clean and fresh, moody and painterly, playful and colorful, or natural and rustic.
Choose Produce That Gives You Shape, Color, and Texture
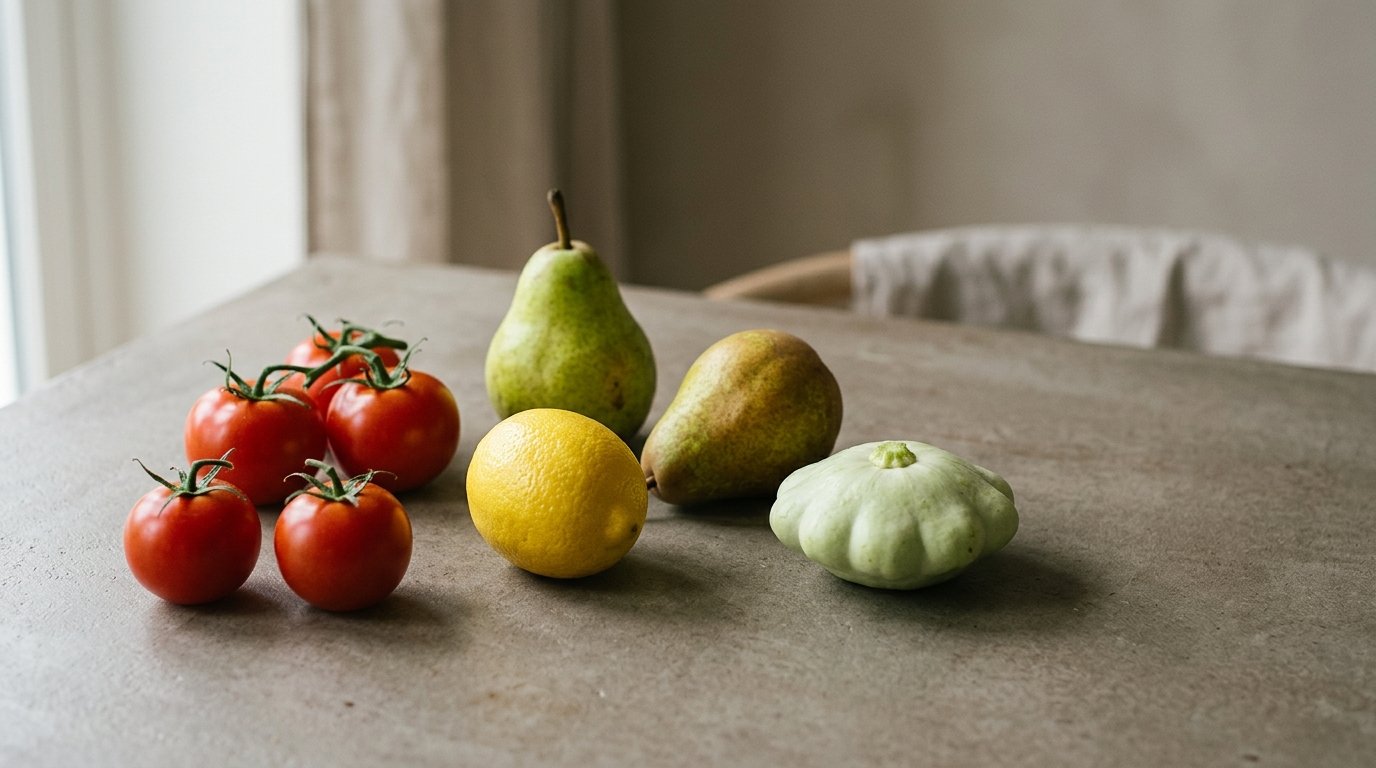
Good still life subjects have visual variety. Look for produce with different shapes, sizes, colors, and surfaces. A smooth red apple, rough ginger root, leafy cabbage, shiny eggplant, sliced orange, and knobbly potato all photograph differently.
Choose one “hero” subject first. This is the main item viewers notice. Then add supporting produce that contrasts with it. For example, pair round tomatoes with long carrots, green pears with purple onions, or yellow lemons with dark leafy greens.
Do not choose only perfect items. A curled leaf, cut pepper, half-peeled orange, or bruised pear can make the photo feel more real and interesting.
Set up Simple Light Before You Arrange the Scene
Light decides the mood before composition does. For beginners, window light is the easiest option. Place your setup near a window, but not in harsh direct sun unless you want strong shadows and high contrast.
Side light is a strong starting point. Put the window to the left or right of the produce so the light reveals shape and texture. Front light can look flat, while backlight can make leaves, citrus slices, and translucent skins glow.
If the shadows are too dark, place a white card, paper, or foam board opposite the window to bounce light back into the scene. If the light is too harsh, hang a sheer curtain or white baking paper over the window. Think of light as something you shape, not just something you find.
Build the Composition One Layer at a Time
Start with the background and surface, then add the main subject. Place your hero fruit or vegetable slightly off-center instead of directly in the middle. After that, add supporting items one by one.
Use simple composition tools. Try a triangle arrangement with three main objects. Use a diagonal line by placing produce from front-left to back-right. Create depth by putting one item close to the camera, one in the middle, and one farther back.
Leave some negative space so the image can breathe. If every corner is filled, the viewer may not know where to look. Also check the edges of the frame for distracting stems, labels, dirty plates, or chopped-off objects. A strong still life often comes from removing items, not adding more.
Camera Settings for Sharp, Controlled Still Life Photos
Because fruit and vegetables do not move, you can slow down and use controlled settings. If you have a camera, use aperture priority or manual mode. A tripod helps you use lower ISO and slower shutter speeds without blur.
For a phone, tap to focus on the main subject, reduce exposure slightly if highlights are too bright, and avoid heavy portrait blur unless it looks natural.
| Situation | Suggested setting | Why it helps |
|---|---|---|
| — | —: | — |
| Handheld camera shot | 1/125 sec or faster | Reduces camera shake |
| Tripod still life | 1/15 sec or slower if needed | Allows low ISO in dim light |
| General aperture | f/5.6 to f/8 | Keeps most produce sharp |
| Close-up detail | f/2.8 to f/4 | Softens background |
| ISO | 100–400 | Keeps image clean |
| Phone camera | Tap focus, adjust exposure | Controls sharpness and brightness |
Take a test shot, zoom in, and check focus. If the front apple is sharp but the back vegetables are blurry, use a smaller aperture such as f/8 or move the objects closer together.
Try These Creative Fruit and Vegetable Shot Ideas
Use these prompts as mini assignments. Shoot at least three, then choose your strongest image.
- Color study: Pick one dominant color, such as green, red, or orange. Photograph only produce and props that support that color family.
- Complementary contrast: Pair opposite colors, such as tomatoes with green herbs, lemons with purple cabbage, or carrots with blue fabric.
- Texture close-up: Fill the frame with mushroom gills, citrus pulp, onion skin, leafy veins, or rough melon rind.
- Cut and whole: Show one whole item beside a sliced version, such as a whole lemon next to wedges.
- Rustic market scene: Use a basket, cloth, wooden board, or paper bag, but keep props secondary.
- Minimal modern shot: Place one perfect fruit or vegetable on a plain background with strong shadow.
- Before cooking: Arrange ingredients for a simple meal, such as tomatoes, garlic, basil, and pasta.
For each idea, change only one thing at a time: camera angle, light direction, background, or arrangement. This helps you learn what actually improves the photo.
Control Color, Background, and Props
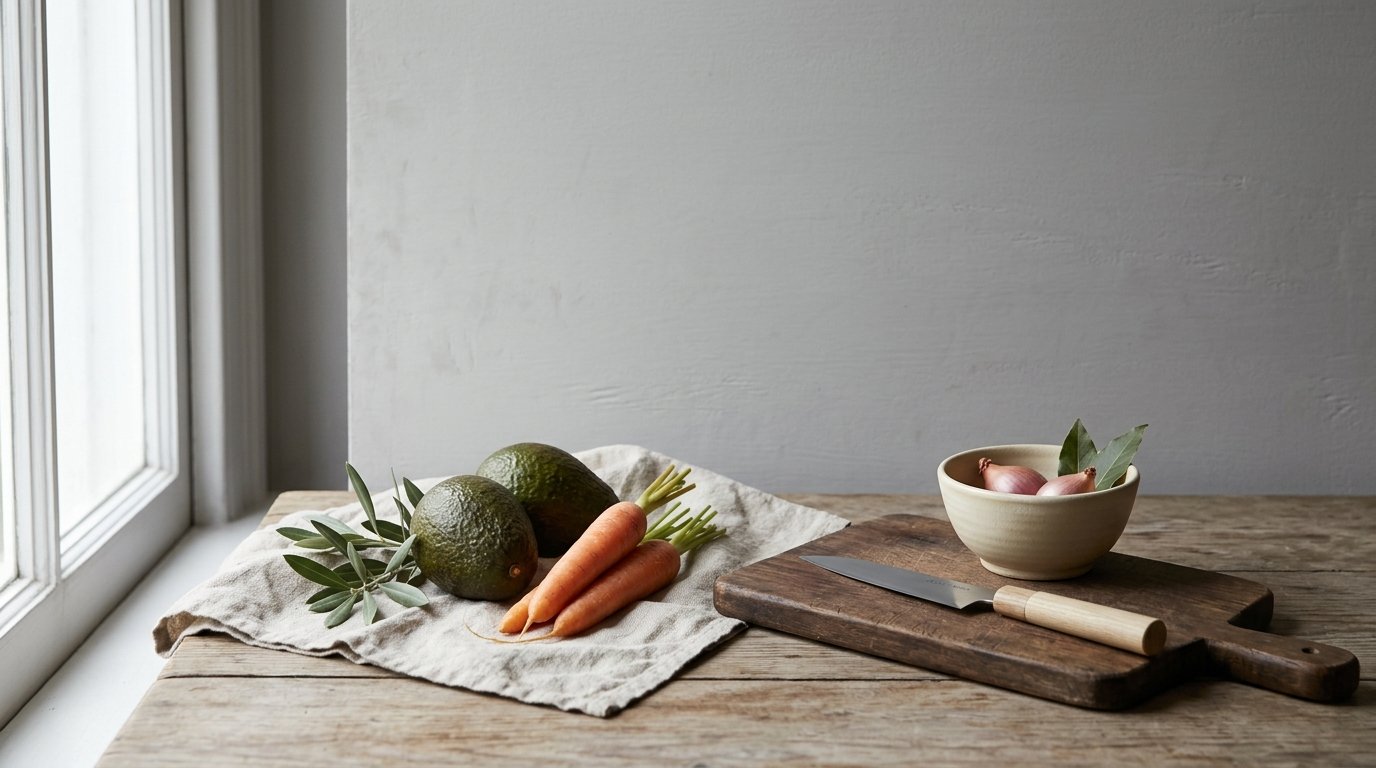
Your background should support the produce, not compete with it. Plain paper, fabric, wood, stone, baking trays, and neutral plates all work well. Avoid busy patterns unless they are part of the concept.
Limit props to one or two: a knife, cloth, bowl, basket, or cutting board. If a prop does not improve the story, remove it.
Watch color balance. Warm produce often looks good with earthy backgrounds, while bright citrus can work well against white, blue, or dark gray. Keep labels, plastic bags, and random kitchen clutter out of the frame.
Edit Gently so the Produce Still Looks Natural
Editing should make the photo cleaner, not fake. Start by adjusting exposure, contrast, white balance, and crop. Increase texture or clarity slightly if you want more detail, but avoid making skins look crunchy or oversharpened.
Keep colors believable. It is fine to make greens fresher or oranges warmer, but if the produce no longer looks edible, the edit has gone too far. Remove small dust spots or distractions, but keep natural character.
Common Mistakes to Avoid in This Assignment
The biggest mistake is starting with too many objects. A crowded scene is harder to light, compose, and understand. Begin small, then add only what helps.
Avoid mixed lighting, such as window light plus a yellow kitchen bulb. It can create strange color casts. Also avoid shooting from only eye level. Try overhead, 45-degree, and low side angles.
Finally, do not rush. Still life photography rewards small adjustments: turn the apple, move the leaf, soften the shadow, and reshoot.
Final Challenge Checklist
Before you finish, make sure you have:
- One clear hero subject
- A simple background and surface
- Side light, backlight, or softened window light
- Shadows controlled with a reflector if needed
- A deliberate composition, not a random pile
- Sharp focus on the most important area
- At least three creative variations
- A gentle edit that keeps the produce natural
Your final image should feel intentional, even if the setup is simple.
FAQ
What Should a Beginner Know First About Photographing Fruit and Vegies New Assignment?
Start with a simple still life, not a complicated food scene. Choose a few pieces of produce, place them near soft window light, and build the composition slowly. The main skill is learning to control light, shape, color, and background with ordinary subjects.
What Matters Most When Evaluating Photographing Fruit and Vegies New Assignment?
Look for a clear subject, pleasing light, and an uncluttered composition. The viewer should know where to look first. Sharp focus, natural color, and controlled shadows also matter, but the image succeeds when the arrangement feels intentional rather than accidental.
What Mistakes Should Readers Avoid with Photographing Fruit and Vegies New Assignment?
Avoid using too many items, mixing different light sources, ignoring the background, and overediting the colors. Beginners often add more props to fix a weak photo, but it is usually better to simplify the scene, improve the light, and refine the subject placement.
What Is the Next Logical Step After Learning About Photographing Fruit and Vegies New Assignment?
Repeat the assignment with one new limitation. Try only one color, only natural window light, only overhead compositions, or only close-up textures. Comparing these small variations will teach you more than making one setup and moving on too quickly.