
To photograph buildings well, choose good light, find a strong viewpoint, control vertical lines, compose around shape and structure, and use a tripod when sharpness matters. A wide-angle lens can help, but stronger architecture photos usually come from careful positioning, clean framing, good exposure, and attention to reflections, symmetry, texture, and context.
The basic workflow is simple: plan the shoot, arrive when the light suits the building, walk around before setting up, decide what the photo is about, keep the camera level when you want straight lines, and check the frame before leaving. Whether you use a mirrorless camera, DSLR, compact camera, or phone, the biggest improvements usually come from better timing and more deliberate camera placement.
Quick Setup for Photographing Buildings
Good building photography starts before you press the shutter. You need usable light, a clear viewpoint, and enough perspective control to make the structure look intentional.
For most exterior building photos, start with:
- RAW capture if your camera or phone supports it.
- ISO 100 or the lowest practical ISO for cleaner files.
- f/8 to f/11 when you want the whole building sharp.
- A tripod for interiors, blue hour, night scenes, and precise compositions.
- Gridlines or an electronic level to keep the camera straight.
- A final edge check for distractions before taking the shot.
You do not need expensive equipment to make strong architecture photos. A phone held level in good light can produce a cleaner image than a high-end camera used in poor light from a rushed position.
Useful gear includes:
- Camera or phone
- Wide-angle lens for tight spaces and interiors
- Standard lens for natural-looking perspective
- Telephoto lens for details and compressed views
- Tripod for low light and precise framing
- Remote release or two-second timer
- Polarizing filter for some reflections and skies
- Lens cloth
- Shot list and access plan
- Optional tilt-shift lens for advanced perspective control
| Situation | Lens / View | Starting Settings | Best Timing | Key Tip |
|---|---|---|---|---|
| Exterior in daylight | Standard or wide-angle | ISO 100, f/8–f/11 | Morning, late afternoon, or side light | Keep the camera level |
| Blue hour city building | Wide or standard, tripod | ISO 100–400, f/8, slow shutter | 15–40 minutes after sunset | Balance lit windows with the sky |
| Interiors | Wide-angle, tripod if allowed | Low ISO, f/5.6–f/11 | Even light | Bracket if windows are bright |
| Tall buildings | Wide-angle or standard from farther back | ISO 100, f/8 | Soft or side light | Avoid tilting unless you want drama |
| Details | Standard or telephoto | ISO 100–400, f/4–f/8 | Side light or overcast | Focus on pattern and texture |
| Handheld street scenes | Standard or phone camera | Auto ISO, fast shutter | Good daylight | Wait for people or cars to improve the scene |
Before leaving a location, zoom in and check for blur, tilted lines, clipped highlights, and distractions at the edges. It is easier to reshoot on location than to rescue a weak file later.
Plan the Shoot Before You Arrive
A small amount of planning makes photographing buildings much easier. Architecture is fixed, but light, access, traffic, weather, and crowds change constantly. If you arrive randomly, you may find the facade in shadow, the best viewpoint blocked, or tripods banned inside.
Start by researching the building’s orientation. If the main facade faces east, morning light may work best. If it faces west, late afternoon might be better. For glass, metal, or reflective surfaces, the sun angle can dramatically change the result.
Check:
- Public viewpoints nearby
- Access hours and entry rules
- Whether tripods are allowed
- Street closures or construction
- Parking or public transport options
- Sunrise, sunset, and blue hour times
- Weather and cloud cover
- Direction of the sun at your planned time
If you are photographing a private building, interior, commercial property, or residential space, follow the rules and ask permission where needed. Even when shooting from a public place, be respectful. Avoid blocking entrances, sidewalks, bike lanes, and emergency access. If security staff or property managers ask you to move, stay polite and adapt.
Create a simple shot list before you go:
- Full exterior from the cleanest public viewpoint
- Entrance or main doorway
- Vertical composition of the facade
- Horizontal composition showing context
- Detail of materials, texture, signage, or windows
- Reflection or shadow pattern
- Interior view if allowed
- Environmental view showing the building in its surroundings
This keeps you from coming home with ten versions of the same angle and no variety.
When you arrive, scout first. Walk around and test quick compositions with your phone before unpacking a tripod or changing lenses. Check whether the viewpoint works, whether vertical lines are manageable, and whether foreground clutter is a problem. Once you find a strong position, set up your main camera and refine the frame.
Planning does not remove spontaneity. It gives you better chances. You can still react to passing clouds, people, reflections, or unexpected light, but from a stronger starting point.
Choose the Best Light and Time of Day
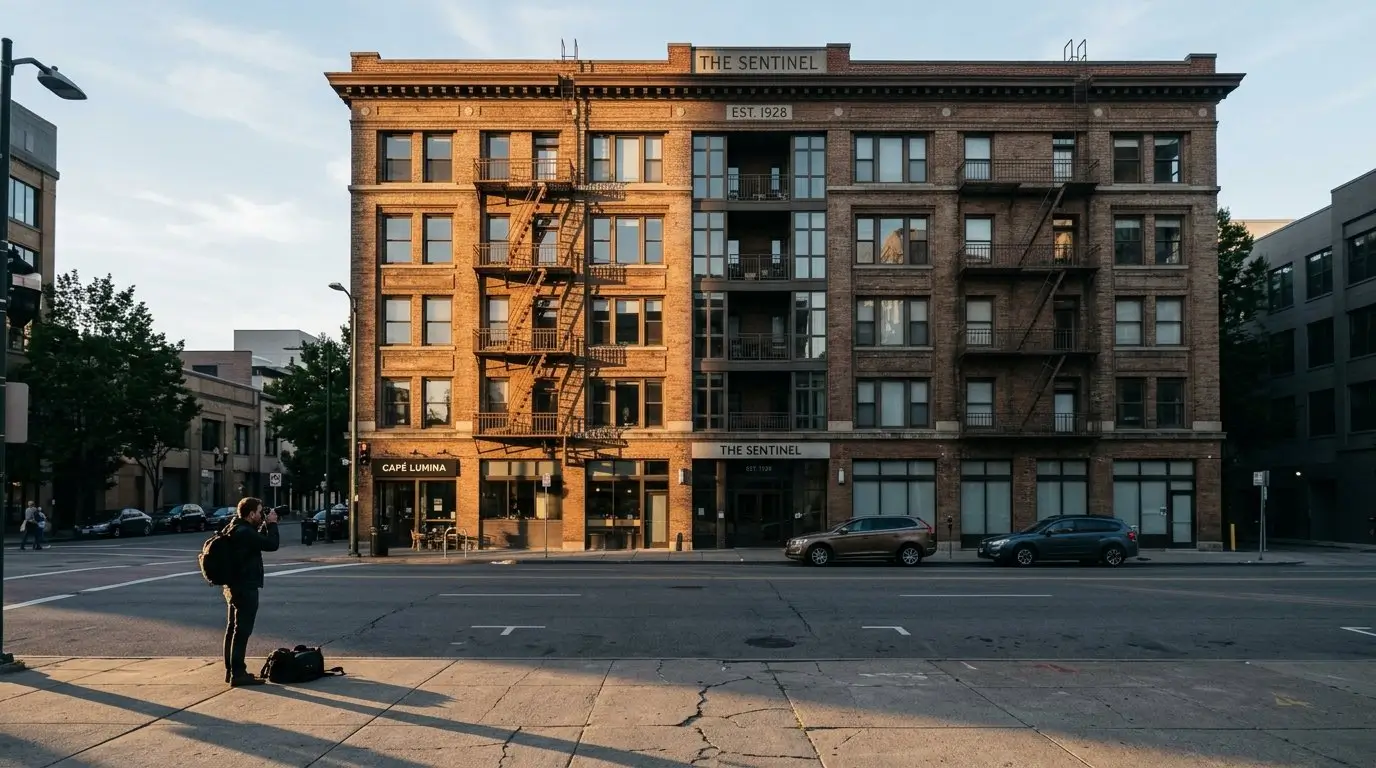
Light changes how a building feels. The same structure can look flat, dramatic, elegant, harsh, warm, cold, busy, or calm depending on time of day and weather. Learning to read light is as important as choosing a lens.
Front light hits the building directly from behind or near the camera. It makes facades clear and evenly visible, which is useful for documentary-style images, but it can flatten texture and reduce depth.
Side light is often excellent for architecture. It reveals texture, depth, columns, window frames, balconies, stonework, brick patterns, and relief. It can also create shadows that define the building’s shape.
Backlight places the sun behind the building. This can create silhouettes, glowing edges, or dramatic skies, but exposure becomes harder. If you want detail in the building, you may need exposure bracketing or careful shadow recovery. If you want a silhouette, expose for the sky.
Overcast light can work well for modern buildings, glass surfaces, interiors, courtyards, and evenly lit facades. Clouds reduce harsh shadows and glare, making color and texture more even.
Golden hour happens shortly after sunrise and before sunset. The light is lower, warmer, and softer than midday light. It can add warmth to stone, brick, concrete, and wood. Direction still matters: a beautiful sunset does not help if the main facade is fully in shadow.
Blue hour is especially useful for city buildings. It occurs after sunset or before sunrise when the sky is deep blue but not black. Interior lights, signs, street lamps, and windows can balance nicely with the remaining sky brightness. A tripod is usually necessary.
Midday sun can be difficult because it creates strong contrast, deep shadows, blown highlights, and harsh reflections. If you must shoot at noon, look for shaded facades, abstract details, graphic shadows, or interior views instead of forcing a full exterior shot.
In high-contrast scenes, protect important highlights. Bright clouds, white walls, glass reflections, and lit windows can clip quickly. Use exposure compensation when the camera makes the image too bright or dark. In extreme contrast, bracket exposures so you have files for highlights, midtones, and shadows.
The best light is the light that supports your subject. A historic stone building may benefit from warm side light. A glass tower may look better under overcast skies or at blue hour. A minimal white building may need soft, even light to preserve clean lines.
Compose Strong Building Photos Step by Step
Composition is where building photography becomes deliberate. Instead of simply pointing the camera at a structure, you decide what the viewer should notice and how the building should feel.
Step 1: Walk around before taking the final photo
Do not settle for the first view. Walk left and right, cross the street if safe, move closer, step back, crouch lower, and look for higher viewpoints if available. Small changes can remove a street sign, align a doorway, reveal a pattern, or clarify the building’s shape.
Look for the cleanest angle: one where the main lines are easy to read, the light is working, and distractions are reduced. A corner view can show depth, while a side view can emphasize rhythm and repetition.
Step 2: Decide what the photo is about
Before refining the frame, choose the subject. Is the photo about:
- The entire building?
- The entrance?
- Symmetry?
- Height?
- Scale?
- Texture?
- A repeating pattern?
- The building in its neighborhood?
- Light and shadow?
- A reflection?
This decision affects every choice. If the photo is about the whole building, you need space and clean edges. If it is about a detail, move closer. If it is about scale, a person, car, bicycle, or tree may help. If it is about symmetry, your position must be precise.
Step 3: Keep vertical lines straight when possible
A common problem in building photography is leaning verticals. This happens when you tilt the camera upward to fit a tall building into the frame. The vertical lines converge, and the structure can look like it is falling backward.
To reduce this:
- Keep the camera level.
- Step farther back if possible.
- Use a wider lens only when needed.
- Shoot with extra space for cropping.
- Use a tripod head level or electronic level.
- Correct perspective in editing when appropriate.
Converging verticals can look dramatic, especially with skyscrapers or abstract upward views. The key is intention. If the lines lean, make sure it feels like a creative choice.
Step 4: Use compositional tools intentionally
Architecture gives you lines, curves, frames, repetition, symmetry, and geometry. Use them deliberately.
Leading lines such as roads, paths, railings, shadows, pavement seams, and bridges can guide the viewer toward the building.
Symmetry works well with entrances, staircases, corridors, windows, and formal facades. Stand centered and keep the camera level.
Frames within frames add depth. Doorways, arches, windows, trees, tunnels, and surrounding buildings can frame the main subject.
Reflections can make a familiar building more interesting. Look in puddles, glass walls, polished floors, fountains, rivers, and nearby windows.
Foreground elements can create depth, but they should help the image. A bench, tree branch, shadow, or path may add context. A trash bin or random sign may weaken the frame.
Negative space can be powerful. Open sky, blank wall, or empty pavement can emphasize shape and simplicity.
Step 5: Watch the edges of the frame
The edges are where many building photos fail. Before taking the final shot, scan all four sides for:
- Clipped rooflines
- Cut-off columns or windows
- Bright signs
- Poles growing out of the building
- Cars in awkward positions
- Trash bins
- Half-visible pedestrians
- Uneven gaps in symmetrical compositions
- Distracting reflections
- Slivers of unrelated buildings
A cleaner frame often needs only a small adjustment: move sideways, raise the camera, wait for someone to pass, or zoom in slightly.
Step 6: Shoot both wide and tight compositions
A strong building set includes variety. Start with the wide view to show the whole structure, then move closer for details: materials, door handles, staircases, window patterns, signage, shadows, and textures. Wide shots show context. Tight shots show design.
Step 7: Try portrait and landscape orientation
Tall buildings often work well vertically, but not every building needs a portrait frame. Landscape orientation may better show the relationship between the building and its surroundings. Street-level facades, plazas, courtyards, and long horizontal structures often benefit from a wider composition.
When in doubt, shoot both. Orientation changes the energy of the image and may reveal a stronger option later.
Step 8: Include people or vehicles only when they help
People, bicycles, cars, and buses can add scale and life. A single person walking past a large facade can show size; a blurred vehicle can add movement. But if those elements distract from the architecture, wait for a cleaner moment. Many scenes improve after ten seconds of patience.
Choose the right lens for the composition
A wide-angle lens is useful in tight streets, interiors, and small courtyards, but it can exaggerate perspective if you stand too close. Edges may stretch, and nearby objects can look distorted.
A standard lens gives a more natural perspective when you can step back. It often makes buildings look less warped and more balanced.
A telephoto lens is excellent for details, compressed city scenes, distant facades, rooflines, and patterns. It can isolate design elements that are easy to miss with a wide lens.
Avoid using an ultra-wide lens simply to “fit everything in” if it makes the building look unnatural. Sometimes the better solution is to step back, choose a partial composition, or photograph from a different angle.
Camera Settings, Focus, and Sharpness
Sharp building photos depend on stable technique, suitable settings, and careful focus. Architecture usually gives you time to slow down, so use that advantage.
For most exterior scenes, aperture priority mode is practical. Set the aperture, choose a low ISO, and let the camera select the shutter speed. If the shutter speed becomes too slow for handheld shooting, raise the ISO or use a tripod.
Manual mode is useful when the light is stable, when you need consistent exposure across a series, or when working from a tripod at night. It also helps when bright skies, dark walls, or reflective glass fool the meter.
A common sharpness range for architecture is f/8 to f/11. These apertures usually provide enough depth of field while keeping lens performance strong. Use wider apertures such as f/2.8 or f/4 when you want to isolate a detail, blur the background, or shoot handheld in lower light.
Use the lowest practical ISO. On a tripod, ISO 100 or base ISO is usually ideal. Handheld, you may need a higher ISO to keep the shutter speed fast enough.
A tripod is especially helpful for:
- Blue hour photos
- Night exteriors
- Interiors
- Long exposures
- Bracketed exposures
- Precise symmetrical compositions
- Low ISO images in dim light
To reduce vibration, use a two-second timer, remote release, or electronic shutter if available. On some cameras, turning off image stabilization while using a tripod may help, depending on the system.
For focus, place your focus point on the main architectural surface or about one-third into the scene when you need broad depth. Use focus magnification or live view to confirm sharpness. With a phone, tap the building or important detail to set focus.
Exposure bracketing is useful when the scene has extreme contrast. Interiors with bright windows are a classic example. Night buildings with bright signs or lit windows can also benefit. If you combine exposures later, aim for a natural result.
A polarizing filter can reduce some reflections and deepen blue skies, but use it carefully. With wide-angle lenses, the sky can become uneven, and glass buildings may show patchy reflections. Rotate the filter while looking through the viewfinder or screen, and stop when the effect looks natural.
If you are using a phone:
- Turn on gridlines.
- Keep the phone level.
- Tap to focus.
- Lower exposure if highlights clip.
- Clean the lens.
- Avoid excessive digital zoom.
- Use night mode or a small tripod in low light.
Sharpness is not only a setting. It comes from stable shooting, correct focus, enough shutter speed, clean glass, and checking the image before you move on.
Fix Common Problems in the Field and in Editing
Even careful building photos can have issues. Recognize problems early, fix what you can in the field, and edit with restraint afterward.
Problem: The building looks like it is leaning backward
This usually happens because the camera was tilted upward. The more you tilt, the more vertical lines converge.
Try this in the field:
- Step farther back.
- Keep the camera level.
- Use a longer focal length from farther away.
- Find a higher viewpoint.
- Leave extra space for cropping.
- Use a tilt-shift lens if you have one and know how to use it.
In editing, use perspective correction or vertical transform tools. Do not push corrections so far that the building looks stretched. A small correction often looks better than a perfect but unnatural fix.
Problem: The photo looks dull
A dull building photo often comes from flat light, unclear subject choice, or clutter. First, ask what the image is about. If the answer is “the building,” but the frame includes half the street, parked cars, signs, and empty sky, simplify.
Try:
- Returning when the light is better
- Using side light to reveal texture
- Looking for reflections
- Moving closer to a detail
- Adding a clean foreground element
- Shooting at blue hour
- Changing height or angle
- Cropping to emphasize shape or pattern
Sometimes the best solution is not stronger editing. It is better timing or a clearer composition.
Problem: Windows are blown out or interiors are too dark
Buildings often contain bright windows and dark interior spaces in the same frame. Your camera may not capture both perfectly in one exposure.
In the field:
- Expose for highlights if window detail matters.
- Use exposure compensation to darken the image slightly.
- Bracket exposures.
- Wait for softer exterior light.
- Turn on interior lights if you have permission.
- Use a tripod for lower ISO and slower shutter speeds.
In editing, recover highlights and lift shadows carefully. HDR can help, but keep it natural. Extreme HDR often makes architecture look artificial, with glowing edges, muddy colors, and unrealistic contrast.
Problem: The scene is too busy
Street clutter is common when photographing buildings. Cars, signs, people, wires, bins, and construction barriers can compete with the subject.
Try:
- Waiting for a cleaner moment
- Shooting early in the morning
- Moving closer
- Using a tighter lens
- Raising the camera slightly
- Framing above street level
- Using a doorway, tree, or wall to hide clutter
- Cropping to the strongest part of the building
If people are in the scene, wait until their positions look intentional. One person in the right spot can help; several half-visible people at the edges usually distract.
Problem: The image looks distorted
Distortion can come from lens choice, camera angle, or perspective correction. Ultra-wide lenses are useful, but if you stand too close, the building may stretch toward the edges.
To reduce distortion:
- Step back when possible.
- Avoid placing important details at the extreme edges.
- Use a standard lens if you have room.
- Keep the camera level.
- Correct lens distortion in editing.
- Avoid over-correcting verticals.
Some distortion is acceptable if it supports the composition. Dramatic upward views of skyscrapers often rely on converging lines. The difference is whether the effect feels deliberate.
Basic editing workflow for building photos
Editing should refine the image, not fight against it. A simple workflow is often enough:
- Straighten the horizon or main reference line.
- Correct verticals if needed.
- Crop for cleaner edges and stronger balance.
- Adjust exposure, highlights, and shadows.
- Set white balance so materials look believable.
- Add moderate contrast if needed.
- Reduce distractions only when appropriate.
- Apply sharpening carefully.
Be cautious with extreme clarity, heavy saturation, dramatic HDR, and unrealistic skies. Architecture photos usually look stronger when lines, materials, and light feel believable.
Final result checklist before you leave
Before packing up, review your images and ask:
- Are the main vertical lines straight, unless intentionally stylized?
- Is the main subject sharp?
- Are the frame edges clean?
- Are highlights controlled?
- Is the light helping the building?
- Is the subject clear?
- Are there distracting cars, signs, poles, bins, or people?
- Did you shoot both wide and tight options?
- Did you try vertical and horizontal compositions?
- Do you have enough variety for the final set?
If something looks wrong on location, reshoot it. A two-minute correction in the field can save a frustrating editing session later.
FAQ
What is the best lens for photographing buildings?
A wide-angle lens is useful for tight streets and interiors, while a standard lens gives a more natural perspective when you can step back. A telephoto lens is great for details, patterns, and compressed city views. The best lens depends on the space and composition.
How do I keep buildings from looking like they are leaning backward?
Keep the camera level instead of tilting it upward. Step farther back, use a longer focal length, or leave extra room for cropping and perspective correction. If you want converging verticals for drama, make the effect look intentional.
What time of day is best for building photography?
Early morning, late afternoon, and blue hour are often the most useful times. Side light reveals texture and depth, while blue hour balances building lights with the sky. Overcast days can also work well for glass, interiors, and evenly lit facades.
Do I need a tripod for photographing buildings?
Not always, especially in daylight. A tripod is very helpful for blue hour, night exteriors, interiors, long exposures, bracketing, and precise compositions. If tripods are not allowed, use a higher ISO, stabilize your camera, or shoot handheld in better light.
Can I take good building photos with a phone?
Yes. Turn on gridlines, keep the phone level, tap to focus, and lower exposure if highlights are too bright. Use good light, clean framing, and careful positioning. Avoid excessive digital zoom, and use night mode or a small support in low light.
What settings should I use for sharp architecture photos?
Start with ISO 100 or the lowest practical ISO, f/8 to f/11, and aperture priority or manual mode. Use a tripod when shutter speeds are slow. Focus on the main architectural surface, use a timer or remote release, and review the image for blur before leaving.