Motion in photography is the way a photo shows movement, either by freezing it sharply, blurring it creatively, or combining both effects. Because a photo captures a slice of time, the length of that slice changes how motion appears. A fast shutter speed can stop a bird in flight, while a slow shutter speed can turn flowing water into smooth streaks.
The key idea is control. Motion blur is not always a mistake, and sharpness is not always the best choice. Strong motion photography starts with deciding what you want the viewer to feel: speed, calm, impact, chaos, or direction. Then you choose shutter speed, focus, camera movement, and framing to match that intention.
What Motion Means in Photography
Motion in photography means how movement is recorded during the exposure. Since a camera does not capture an ongoing scene like video, it records what happens while the shutter is open. If something moves during that time, the photo may show blur, sharp action, streaks, or a mix of all three.
Beginners often think motion only means blur, but it is broader than that. A perfectly sharp photo of a jumping athlete still communicates motion through body position, flying hair, or suspended dust. A blurred train can show speed even if the train itself is not detailed.
Think of motion as a creative choice about time. A short exposure shows a tiny instant. A longer exposure shows change across time. Your job is to decide whether the movement should be stopped, suggested, exaggerated, or used as part of the image design.
Why Motion Matters for Stronger Photos
Motion helps a still photo feel alive. It can add energy to sports, atmosphere to street photography, softness to water, drama to wildlife, and rhythm to everyday scenes. Without motion cues, action can look static even when the subject was moving quickly in real life.
Motion also guides emotion. Frozen motion often feels precise, intense, or surprising. Intentional blur can feel dreamy, fast, busy, or abstract. Panning can make a subject feel like it is cutting through space.
Most importantly, motion gives the viewer information. It shows where something came from, where it is going, and how fast it might be moving. That makes the photo easier to read and more engaging.
The Main Ways to Show Motion in a Photo
There are three main ways to handle motion in photography: freeze it, blur it, or combine sharpness with blur.
Freezing motion means using a fast enough shutter speed to make the moving subject look sharp. This is common in sports, wildlife, children’s portraits, and action scenes. A bird’s wings, a splashing wave, or a basketball player in midair can all look powerful when stopped at the right instant.
Motion blur means allowing movement to smear across the frame. This can happen because the subject moves, the camera moves, or both. Examples include silky waterfalls, car light trails, blurred crowds, or a dancer’s arm sweeping through the frame.
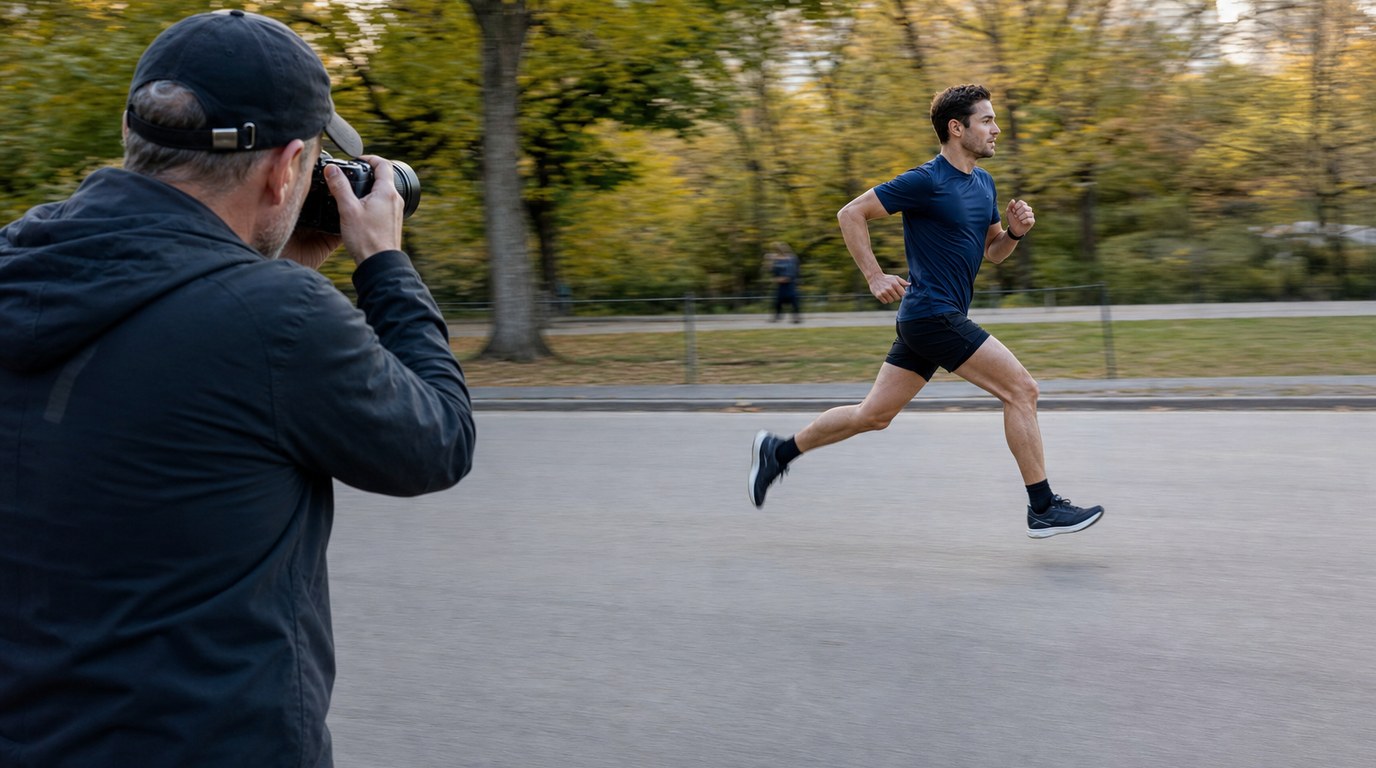
Panning sits between the two. You move the camera with the subject during the exposure. Ideally, the subject stays relatively sharp while the background turns into horizontal streaks. This technique is useful for cyclists, runners, cars, animals, and anything moving across your view.
| Visual result | Typical technique | Common starting point |
|---|---|---|
| Sharp action | Fast shutter speed | 1/500s to 1/2000s |
| Soft moving water | Slow shutter speed | 1/4s to several seconds |
| Light trails | Long exposure | 5s to 30s |
| Sharp subject, blurred background | Panning | 1/15s to 1/125s |
These are starting points, not rules. The speed of the subject, distance from the camera, lens choice, and your steadiness all change the result.
The Camera Settings That Control Motion
Shutter speed is the main setting that controls motion in photography. It determines how long the sensor is exposed to light. A fast shutter speed, such as 1/1000s, captures a very short moment and helps freeze movement. A slow shutter speed, such as 1/10s or 2 seconds, records more movement and creates blur.
Aperture and ISO support your shutter speed choice. If you need a faster shutter, the camera needs more light. You can open the aperture to a lower f-number, raise ISO, or shoot in brighter light. If you want a slower shutter in daylight, you may need a smaller aperture, lower ISO, or a neutral density filter.
Focus mode also matters. For moving subjects, continuous autofocus is usually better than single autofocus because it keeps adjusting as the subject moves. Burst mode can help you capture the best body position or moment of peak action.
Image stabilization helps reduce camera shake, but it does not freeze a moving subject. It can make your hand-held slow shutter shots steadier, yet a running person may still blur if the shutter speed is too slow.
A useful beginner approach is to choose shutter priority mode first. Set the shutter speed for the motion effect you want, then let the camera help balance aperture and ISO.
How to Freeze Motion
To freeze motion, start with a fast shutter speed and adjust from there. For walking people, 1/250s may be enough. For running, sports, pets, or wildlife, try 1/500s to 1/1000s. For very fast subjects, such as birds in flight or splashing water, start around 1/2000s.
Use continuous autofocus if your subject is moving toward, away from, or across the camera. Select a focus area that can stay on the subject, and use burst mode for short sequences. This gives you more chances to catch the strongest gesture.
Watch the light carefully. Fast shutter speeds reduce exposure time, so photos can become dark. Raise ISO or use a wider aperture if needed. A little noise is often better than a blurry subject when your goal is sharp action.
How to Create Motion Blur on Purpose
Intentional motion blur starts with slowing the shutter speed enough for movement to show. The right speed depends on the subject. A person walking may blur at 1/15s. Flowing water may become smooth around 1/4s to 2 seconds. Clouds or stars may need much longer exposures.
Use a tripod when you want the background to stay sharp while the moving subject blurs. This works well for waterfalls, traffic trails, and people moving through architecture. If everything in the image is blurry, the camera may have moved too much.
In bright conditions, slow shutter speeds can overexpose the image. Use the lowest ISO, a smaller aperture, or an ND filter to cut light. Take test shots and review the blur. If the motion is too subtle, slow the shutter. If the subject disappears completely, speed it up.
The goal is for blur to look intentional. Include some stable visual anchor, such as a rock, building, road, or still person, so the viewer can compare movement against stillness.
How to Use Panning for Dynamic Motion
Panning is a technique where you follow a moving subject with your camera while using a moderately slow shutter speed. The subject remains partly sharp, while the background blurs in the direction of movement.
Start with a subject moving across your frame, not straight toward you. Try 1/60s for cyclists or runners, 1/125s for faster vehicles, and 1/30s for slower movement. Stand with your feet stable, twist from your waist, and track the subject smoothly before pressing the shutter.
Keep moving after the shot instead of stopping suddenly. This follow-through helps create smoother background streaks. Use continuous autofocus and burst mode if available.
Panning takes practice, so expect many missed frames. A good panning photo does not need perfect sharpness everywhere; it needs enough detail on the subject to feel intentional.
Composition Tips for Showing Direction and Energy
Framing affects how motion feels. Leave space in front of a moving subject so it has room to move into the frame. If a runner, cyclist, or animal is placed too close to the edge it is moving toward, the photo can feel cramped.
Use lines that support movement. Roads, waves, fences, shadows, and trails can point the viewer’s eye in the same direction as the action. Diagonal lines often feel more energetic than straight horizontal or vertical lines.
Think about the background too. A cluttered background can hide motion blur or make panning messy. A simpler background makes streaks easier to read.
Timing is part of composition. Capture gestures at their peak: a dancer fully extended, a ball just leaving a hand, or a splash at its widest shape. The right moment often communicates motion better than blur alone.
Common Mistakes When Photographing Motion
The most common mistake is using a shutter speed that does not match the goal. If you want sharp action, a slow shutter causes accidental blur. If you want creative blur, a fast shutter may make the scene look ordinary.
Another mistake is confusing camera shake with subject motion. Camera shake usually makes the whole image look smeared, while intentional motion blur often leaves some stable parts sharp.
Beginners also forget to adjust ISO or aperture after changing shutter speed. Motion control affects exposure, so check brightness after each major change.
Finally, avoid relying on one shot. Movement changes quickly, and small timing differences can make a big visual difference.
A Simple Practice Plan for Learning Motion

Practice motion in three short sessions. First, photograph a moving person or pet at 1/250s, 1/500s, and 1/1000s. Compare sharpness.
Second, use a tripod near moving water, traffic, or pedestrians. Try 1/30s, 1/4s, and 2 seconds to see how blur changes.
Third, practice panning with bicycles or cars. Start at 1/60s and shoot in short bursts. Review which frames have the best balance of subject sharpness and background blur. This simple routine builds a practical feel for time, movement, and control.
FAQ
What Should a Beginner Know First About Motion in Photography?
A beginner should know that motion in photography is controlled mainly by shutter speed. Fast shutter speeds freeze action, while slow shutter speeds show blur. Neither result is automatically better. The best choice depends on whether you want the photo to feel sharp, energetic, soft, or fast.
What Matters Most When Evaluating Motion in Photography?
The most important question is whether the motion looks intentional. A sharp action photo should have enough detail in the subject. A blurred photo should have a clear visual purpose, such as showing speed, flow, or atmosphere. Good motion supports the story of the scene.
What Mistakes Should Readers Avoid with Motion in Photography?
Avoid using random shutter speeds without a goal. Also avoid mistaking camera shake for creative blur, forgetting to adjust exposure, and expecting every action frame to work. Motion photography often requires testing, reviewing, and shooting several frames to capture the strongest moment.
What Is the Next Logical Step After Learning About Motion in Photography?
The next step is deliberate practice with shutter speed. Choose one subject, such as traffic, water, pets, or sports, and photograph it at several shutter speeds. Compare the results and note what changed. This builds instinct faster than memorizing settings alone.