Surf photography for beginners comes down to three things: staying safe, using enough focal length, and choosing settings that freeze fast action. If you start from the beach with a telephoto zoom, fast shutter speeds, and simple subject-tracking autofocus, you can get strong surf photos without expensive pro gear or swimming into the lineup.
The biggest beginner mistake is treating surf photography like general beach photography. Waves change fast, surfers move unpredictably, and bright water can trick your exposure. That means your gear, camera settings, and shooting position matter more than usual. A practical starting setup is an entry-level or midrange camera with continuous autofocus, a zoom lens in the 70-300mm or 100-400mm range, and burst shooting. From there, focus on reading the break, timing turns and takeoffs, and shooting in clean light.
This guide gives you a simple mental model first, then walks through equipment choices, settings, beach technique, safety, composition, and a beginner practice plan you can actually use on your next session.
Quick Answer
The main takeaway is simple: the easiest way to start surf photography is from the beach, with a camera that has decent autofocus, a telephoto zoom, and settings built around freezing motion.
For most beginners, the best first setup is:
- A beginner or midrange mirrorless or DSLR camera
- A 70-300mm, 100-400mm, or similar telephoto zoom
- Continuous autofocus
- Burst mode
- A shutter speed around 1/1600s to 1/2500s
- Aperture around f/5.6 to f/8
- Auto ISO with a minimum shutter speed if your camera allows it
That setup works because surf photography has three constant challenges. First, your subjects are far away. Second, they move quickly and change direction without warning. Third, bright reflections from water and sand can cause exposure problems. So beginners need reach, speed, and consistency more than fancy extras.
If you are choosing between shooting from shore or in the water, start on shore. It is safer, cheaper, and better for learning timing, framing, and how waves break. In-water shooting adds housing costs, swimming ability, surf knowledge, and risk. It can produce dramatic images, but it is not the best first step for most people.
A good beginner workflow is: find a beach with a predictable break, shoot in the morning or late afternoon, pick one surfer or one takeoff zone, pre-frame loosely, and fire short bursts at the peak of the action. Focus on clear moments like takeoff, bottom turns, cutbacks, snaps, and exits rather than holding the shutter constantly.
How to Think About This Topic
Beginner surf photography gets much easier when you stop thinking only about the surfer and start thinking about a moving relationship between surfer, wave, and position. A good photo usually happens when all three line up at once.
What Makes Surf Photography Different
Unlike many sports, surf photography depends on the environment as much as the athlete. You are not just tracking a person. You are tracking:
- Where the wave is breaking
- Where the surfer will appear on that wave
- Whether your angle shows the action clearly
- Whether spray, glare, and distance help or hurt the frame
That is why beginners often feel frustrated. They may have the right shutter speed, but still miss the moment because they are aimed at the wrong section of the wave or standing in a poor spot on the beach.
A practical mental model is this: surf photography is prediction more than reaction. If you can read where the wave peaks and where surfers tend to turn, you will get more keepers than someone with better gear but worse timing.
The Four Beginner Decisions That Matter Most
To stay aligned with what most readers want from “surf photography for beginners equipment techniques and tips,” use these four decisions as your framework.
#### 1. Where will you shoot from?
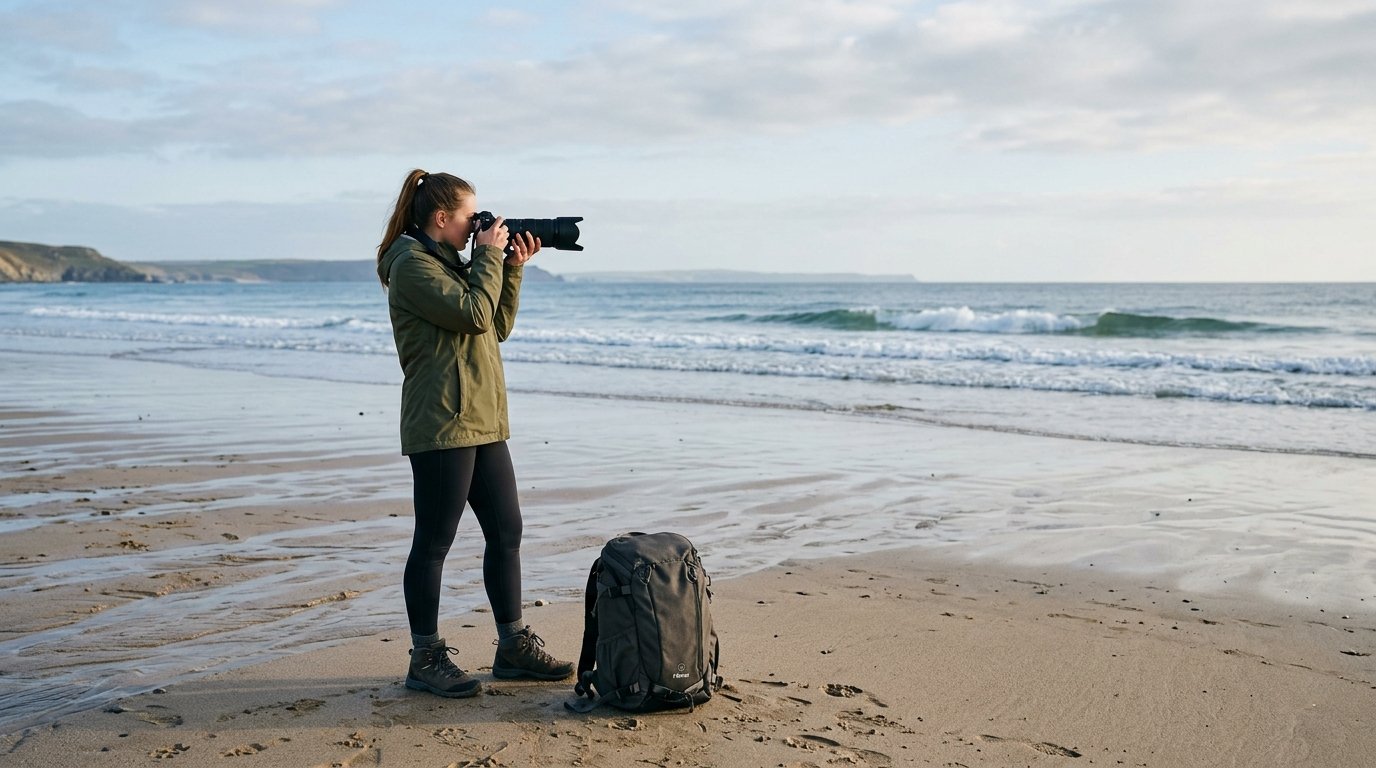
Your position controls everything else. Shooting from the beach gives you stability, lens flexibility, and lower risk. Shooting from a pier, headland, or rocks can improve angle and separation from the background. Shooting in the water creates intimacy and drama, but only if you can handle surf conditions safely.
For beginners, shore-based shooting teaches the core skills first: reading the lineup, tracking riders, and timing moves.
#### 2. How much reach do you need?
Surfers are often much farther away than new photographers expect. Even at a smaller break, a standard kit lens may leave your subject tiny in the frame. Longer focal lengths help isolate the rider and compress the scene, but too much lens can make tracking harder.
That is why zooms are especially useful for beginners. You can go wider when surfers come closer and zoom in when they are farther outside.
#### 3. How will you freeze or show motion?
Most beginners want crisp action, so fast shutter speed is the priority. If you go too slow, the surfer, board, and spray blur together. That can be creative later, but it usually feels like a missed shot at first.
Think of your settings this way:
| Goal | Good starting setting |
|---|---|
| Freeze action cleanly | 1/1600s to 1/2500s |
| Keep enough depth for wave and surfer | f/5.6 to f/8 |
| Handle changing light quickly | Auto ISO |
| Track moving subjects | Continuous AF |
| Capture peak moment | High-speed burst |
This table is the core of a reliable beginner setup.
#### 4. What moment are you trying to catch?
If you just point at every surfer all the time, you will overshoot and still miss the best frame. It helps to know the common action beats:
- Takeoff: dramatic drop, good for steep waves
- Bottom turn: strong body position and spray
- Cutback: board and surfer often visible cleanly
- Top turn or snap: dynamic spray and power
- Barrel entry or exit: exciting but harder to time
- Kick-out or finish: less dramatic, but can still work in clean light
Beginners usually get their best results on takeoffs and turns because those moments are easier to predict than barrels.
Why the Beach Is the Best Classroom
Starting from the beach is not a compromise. It is the fastest way to build useful surf photography skills. You can watch several sets, see where the best waves break, adjust your position, and learn how different angles change the image.
For example, if you stand directly in front of a takeoff zone, you may get dramatic face-on drops. Move down the beach, and suddenly cutbacks and spray become easier to see in profile. This teaches composition and timing at the same time.
So if your goal is practical beginner improvement, think in this order: understand the break, choose the right position, set the camera for speed, then wait for repeatable moments.
Practical Guidance
Now turn that mental model into a first-session plan you can use.
Choose Gear with Beginner Priorities
Do not shop for the “best surf camera” in the abstract. Choose gear based on what actually helps beginners.
#### Camera body
Look for:
- Continuous autofocus that can track moving subjects
- Burst shooting
- Decent buffer performance
- Weather resistance if possible
- Good handling with a long lens
You do not need a flagship sports camera. A beginner camera can absolutely work if it offers reliable AF and enough speed to capture short bursts.
#### Lens
For most beginners, the most useful range is a telephoto zoom. Common starting points:
- 70-300mm: budget-friendly and versatile for closer breaks
- 100-400mm: great all-around range for many beaches
- 70-200mm: useful if the break is close, but often short on reach from shore
If you only have a kit lens, you can still practice timing and positioning, but your subjects will likely look small unless the surfers are very close.
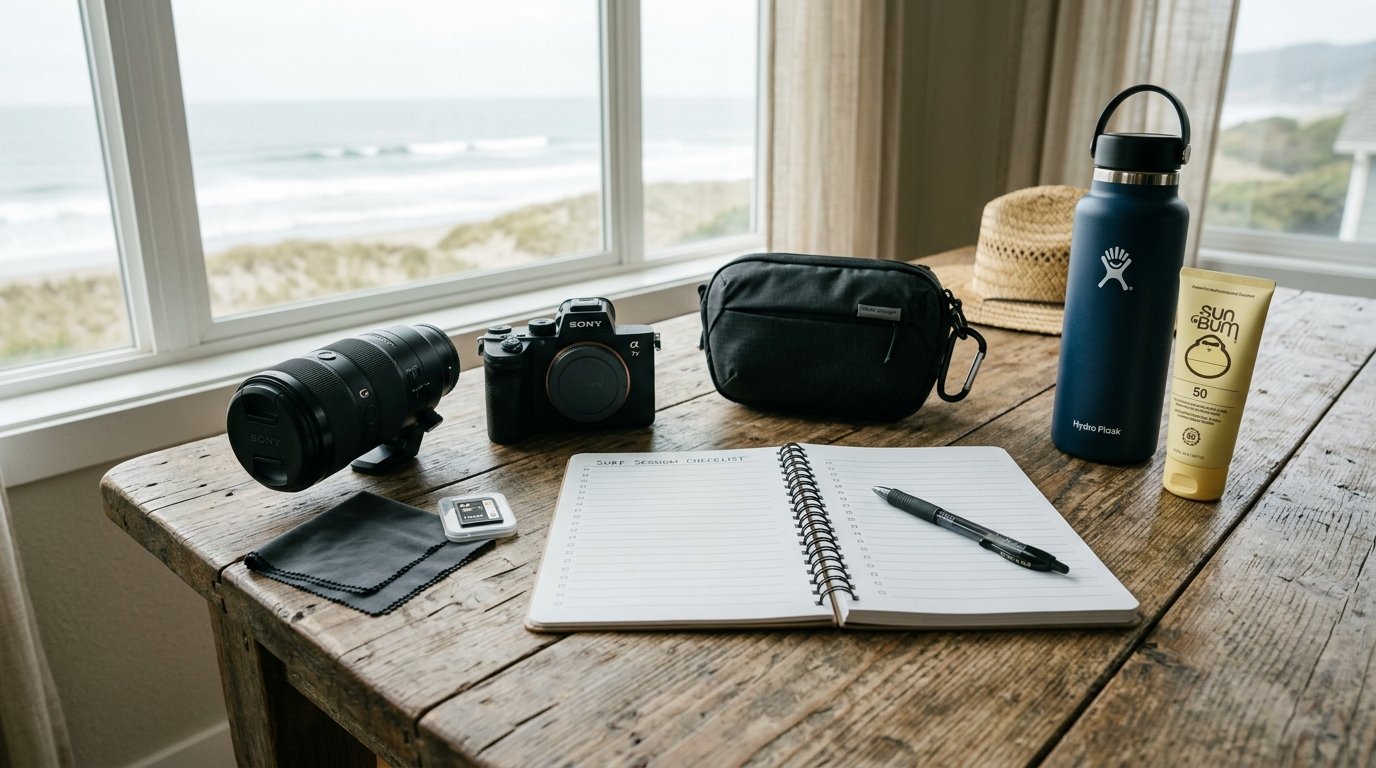
#### Extras
Helpful accessories include:
- Extra batteries
- Fast memory cards for bursts
- Lens hood for flare and spray protection
- Microfiber cloth for salt mist
- Monopod if your lens is heavy
Avoid overpacking. Beginners usually benefit more from mobility than from carrying every accessory they own.
Use Simple Settings That Work
A complicated setup is rarely necessary. Start here and adjust only if conditions force you to.
#### Recommended starting settings
- Mode: Shutter Priority or Manual with Auto ISO
- Shutter speed: 1/1600s to 1/2500s
- Aperture: f/5.6 to f/8
- ISO: Auto, with a reasonable max based on your camera
- Autofocus: AF-C or AI Servo
- AF area: Subject tracking or a flexible zone
- Drive mode: High-speed continuous
- Metering: Evaluative or matrix metering
- File type: RAW if you know how to handle it, JPEG if you want simplicity
On bright days, this setup is easy. On cloudy days or near sunset, your ISO may rise. That is fine. A slightly noisy sharp photo is much better than a clean blurry one.
#### Exposure tip for water and glare
Bright water can fool the meter and make surfers too dark. If your subject looks underexposed, add a little positive exposure compensation and check again. Also watch your highlights, because whitewater can clip quickly in harsh sun.
Learn Where to Stand
Position is one of the biggest differences between average and strong beginner results.
#### From the beach
Start with a spot where you can clearly see the takeoff zone and where surfers tend to turn. Avoid standing too far from the main action just because it is convenient. A small move down the beach can improve your shooting angle a lot.
A useful method is:
- Watch two or three sets before shooting seriously.
- Identify where the best waves break.
- Notice where surfers make their first strong turn.
- Move so that moment is easier to see side-on.
Side-on angles often show board, body position, and spray more clearly than straight-on views.
#### From piers, cliffs, or rocks
Higher angles can make waves look flatter, but they can also simplify backgrounds and help you see sections of the break more clearly. If you shoot from rocks or jetties, make safety the first priority. Wet rocks and incoming sets are not beginner-friendly environments.
#### In the water
If you eventually try in-water surf photography, treat it as a separate skill set. You need ocean knowledge, confidence in surf, strong swimming, and a proper water housing. Start only in mellow conditions, and never sacrifice safety for proximity.
Compose for Action, Not Just Closeness
A tight crop is not automatically a better surf photo. Include enough of the wave to show what the surfer is doing. The wave is part of the story.
Good beginner composition habits:
- Leave space in front of the surfer to show direction
- Include spray when it adds energy
- Keep the horizon level
- Avoid cutting off the board awkwardly
- Shoot both tight action frames and slightly wider frames with wave context
For example, a cutback often looks stronger when the viewer can see the curve of the wave face, not just the surfer filling the frame.
Time Your Bursts Better
Do not hold the shutter down for whole rides. That fills your card and buffer with weak frames. Instead, fire short bursts at likely action points.
Try this:
- Track the surfer before the wave stands up
- Start focusing early
- Shoot a short burst at takeoff
- Pause
- Shoot another burst at the bottom turn or top turn
This approach improves keeper rate and helps you learn to anticipate rather than react late.
Work with Light, Not Against It
Morning and late afternoon usually give the best beginner conditions because the light is softer and the beach is often less harsh-looking. Midday sun can still work, but it tends to create hard contrast and bright reflections.
If the sun is low, try positioning so the surfer is lit from the side or front-side angle rather than fully backlit. Backlight can be beautiful when spray lights up, but it is harder to expose cleanly as a beginner.
Common Beginner Mistakes
Watch for these:
- Using too short a lens from shore
- Letting shutter speed drop too low
- Standing in a bad position and never moving
- Shooting every wave instead of the best ones
- Cropping too tightly in camera
- Ignoring the wave and only watching the surfer
- Trying in-water shooting too early
If one session goes badly, do not assume your gear is the problem. Often the real issue is angle, timing, or reading the break.
A Realistic First Practice Plan
For your next session, keep it simple:
- Go to a beach with a visible, repeatable break.
- Shoot from shore.
- Use a telephoto zoom.
- Set 1/2000s, Auto ISO, continuous AF, and burst mode.
- Watch the lineup for five minutes before shooting.
- Pick one peak or one surfer, not the whole ocean.
- Focus on takeoffs and turns.
- Review images for sharpness, framing, and timing.
Do that a few times before changing too many variables. Beginners improve fastest when they repeat the same basic process and learn what actually caused the missed shots.
FAQ
What Lens Is Best for Beginner Surf Photography?
A telephoto zoom is the best starting point. For most beginners, 70-300mm or 100-400mm gives the most useful mix of reach and flexibility from shore. If your local break is close, 70-200mm can work, but many beach setups need more reach.
What Camera Settings Should I Use for Surf Photography?
Start with 1/1600s to 1/2500s, f/5.6 to f/8, and Auto ISO. Use continuous autofocus, subject tracking or zone AF, and high-speed burst mode. If reflections make surfers too dark, add a small amount of positive exposure compensation.
Can You Do Surf Photography with a Beginner Camera?
Yes. A beginner camera can produce strong surf photos if it has decent continuous autofocus, burst shooting, and you pair it with enough lens reach. Good timing, beach position, and fast shutter speeds matter more than owning a professional sports camera.
Is It Better to Shoot Surf Photos from the Beach or in the Water?
For beginners, the beach is usually better. It is safer, more affordable, and better for learning wave timing, autofocus tracking, and composition. In-water shooting can look dramatic, but it adds housing costs, surf risk, and ocean skills that most beginners should build later.