Quick Answer
The bucket method for photographing flowers is a simple way to control your subject, background, and light by placing cut flowers in a bucket, vase, or similar container before photographing them. Instead of trying to shoot flowers exactly where they grow, you move the flowers into better light, position them against a cleaner background, and compose the image with more control.
The main takeaway: the bucket acts like a portable flower holder. It keeps the stems upright while you adjust angle, height, background distance, and lighting. This makes it much easier for beginners to create polished flower photos without a studio.
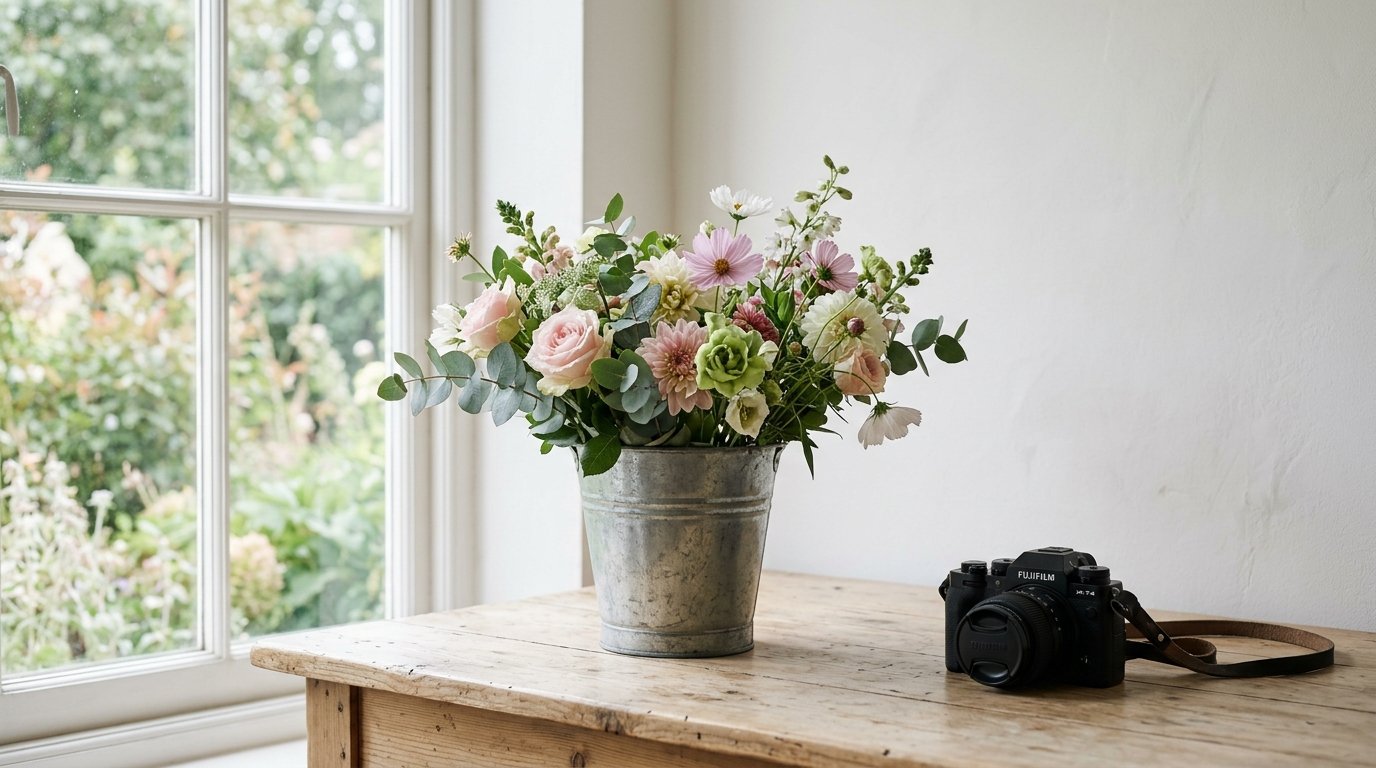
A basic setup might look like this: place a few flowers in a bucket, set the bucket near soft window light or open shade, move it several feet from the background, then photograph from a low or eye-level angle so the bucket is hidden. Use a wide aperture, such as f/2.8 to f/5.6, to blur the background, and focus carefully on the most important petal or flower center.
This method works especially well for garden flowers, market bouquets, wildflowers you are allowed to pick, and practice sessions at home. It is not about making the setup look artificial. It is about giving yourself enough control to make the flower look natural, clean, and intentional in the final photo.
How to Think About This Topic
The easiest way to understand the bucket method is to think of it as a bridge between outdoor flower photography and a controlled still-life setup. You are still photographing real flowers with natural shape, color, and texture, but you are no longer stuck with whatever background, wind, or light happens to be around them.
When you photograph flowers in the ground, three problems often appear at once. The background may be messy, with sticks, bright leaves, fences, cars, or other flowers cutting through the frame. The light may hit from the wrong direction, creating harsh highlights or dull shadows. The flower may also be too low, too crowded, or facing away from the camera.
The bucket method solves these problems by separating the flower from its original location. Once the stems are in a bucket, you can rotate the arrangement, move it into shade, place it near a darker background, or raise it onto a stool or table. Small changes become easy.
Here is a simple mental model:
| Element | What the bucket method lets you control |
|---|---|
| Flower position | Height, angle, spacing, and direction |
| Background | Distance, color, clutter, and blur |
| Light | Softness, direction, and brightness |
| Composition | Camera angle, framing, and subject isolation |
For beginners, the biggest benefit is background control. A beautiful flower can look distracting if there is a bright patch of sky, a white wall, or a tangled garden bed behind it. By moving the bucket farther from the background, you make that background easier to blur. By choosing a darker or simpler background, you help the flower stand out.
Light is the second major benefit. Flowers often photograph best in soft light because petals can lose detail in harsh sun. With the bucket method, you can place the flowers in open shade, beside a window, under a porch, or near a bright doorway. You are not waiting for perfect conditions in the garden; you are building better conditions with a very simple tool.
The method also helps with composition. You can turn the flower until its best side faces the camera. You can remove one distracting stem, spread flowers apart, or group them more tightly. If the bucket appears in the frame, you simply lower the camera angle, move closer, or crop so only the flowers and stems are visible.
Think of the bucket as a temporary stand, not part of the final picture. Its job is to hold the flowers while you make decisions about light, background, and framing.
Practical Guidance
Start with a container that is heavy enough not to tip over. A garden bucket, small vase, jar, or watering can can all work. Add water if the flowers will be out for more than a few minutes, and use stones or floral foam if the stems need support. The container does not need to be attractive because you will usually hide it.
Choose flowers that still have shape and structure. Fresh blooms with clean petals are easiest, but slightly imperfect flowers can also be beautiful if you focus on texture, curves, or color. Avoid overcrowding the bucket at first. One strong flower or three well-spaced stems is often easier to photograph than a full bouquet.
Next, pick your light. For a soft, beginner-friendly look, place the bucket in open shade or near a window with indirect light. If you are outside, avoid midday sun unless you are using shade from a wall, tree, porch, or diffuser. Side light is especially useful because it gives petals shape without making the image look flat.
Then choose the background. Look for something simple: dark shrubs, a shaded fence, a plain wall, distant trees, or a piece of fabric clipped behind the setup. The background should support the flower, not compete with it. If the background looks too sharp or busy, move the bucket farther away from it and use a wider aperture.
A practical setup checklist:
| Step | What to do | Why it helps |
|---|---|---|
| 1 | Put flowers in a stable bucket or vase | Keeps the subject upright |
| 2 | Move the bucket into soft light | Protects petal detail |
| 3 | Place it away from the background | Creates smoother blur |
| 4 | Rotate the flowers | Finds the best-facing angle |
| 5 | Shoot low or close | Hides the container |
| 6 | Focus on the key flower detail | Keeps the image intentional |
For camera settings, begin with aperture priority mode if your camera has it. Try f/2.8 to f/5.6 for a blurred background. If your lens does not open that wide, use its lowest f-number and increase the distance between the flower and background. Keep ISO as low as practical, such as ISO 100 to 400 in good light. If the shutter speed drops too low and your photos blur, raise the ISO or use a tripod.
Focus matters more than complicated settings. For a single flower, focus on the flower center, the front edge of the main petal, or the most visually important detail. For a small group, focus on the flower you want the viewer to notice first. If you are very close, depth of field becomes thin, so take several photos with slightly different focus points.
Composition is where the method becomes creative. Try placing the main flower off-center, leaving space in the direction it faces. Shoot from the same height as the bloom for an intimate look. Shoot slightly above for patterns and color. Shoot through nearby leaves or other flowers to create a soft foreground blur.
If the bucket keeps showing, do not fight it by standing farther away. Instead, lower your camera, zoom in, or move closer until the container falls outside the frame. You can also place the bucket behind a low plant, chair, or table edge, as long as the obstruction looks natural.
Common problems are easy to fix. If the image looks flat, move the setup so light comes from the side. If the petals are too bright, move into shade or reduce exposure slightly. If the background is distracting, increase distance, change angle, or place a darker object behind the flowers. If the flowers move in the wind, bring the bucket indoors, use a sheltered corner, or wait between gusts.
Practice with one flower first. Take ten photos while changing only one thing at a time: background distance, camera height, light direction, or aperture. This teaches you what each adjustment does and makes the bucket method feel natural instead of staged.
FAQ
What Should a Beginner Know First About the Bucket Method for Photographing Flowers?
A beginner should know that the bucket is mainly a support tool. It holds the flowers so you can move them into better light, choose a cleaner background, and compose more carefully. The goal is not to show the bucket, but to use it to control the photo.
What Matters Most When Evaluating the Bucket Method for Photographing Flowers?
The most important things are light, background, and flower position. If the light is soft, the background is uncluttered, and the flower faces the camera well, the method is working. Expensive gear matters less than careful placement and small adjustments.
What Mistakes Should Readers Avoid with the Bucket Method for Photographing Flowers?
Avoid placing the bucket too close to a busy background, shooting in harsh direct sun, or filling the container with too many flowers at once. Also watch for the bucket edge appearing in the frame unless you intentionally want a styled still-life look.
What Is the Next Logical Step After Learning About the Bucket Method for Photographing Flowers?
The next step is to practice with one flower in several lighting situations. Try open shade, window light, and side light, then compare the results. Once you understand how the setup changes the image, experiment with groups of flowers and more creative backgrounds.