

If you’re new to photography, then you know how challenging it can be to shoot with high-contrast settings. Fortunately, Active D-Lighting keeps some of those features in the brightest and darkest parts of the image. But what is Active D-lighting, and how do you use it?
This guide summarizes everything you need to know about Active D-Lighting and how and when to use it. Further down, we’ll also provide a detailed comparison between Active D-lighting and HDR.
Let’s dive into it!
What Is Active D-Lighting?
Active D-Lighting (ADL) is an in-camera feature that expands your dynamic range and corrects the image as it’s being captured. It only performs processing on the dark areas of the picture that call for it. This makes it possible to capture subjects with an extensive dynamic range while still getting an image with a natural-looking amount of contrast.
On specific cameras, you can select from up to five settings Active D-Lighting, each of which offers a distinct level of intensity:
- Low
- Normal
- High
- Extra High
- Auto
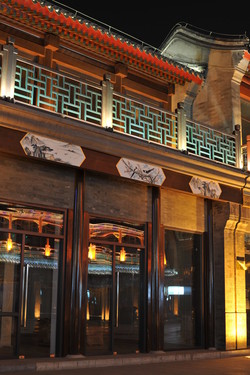
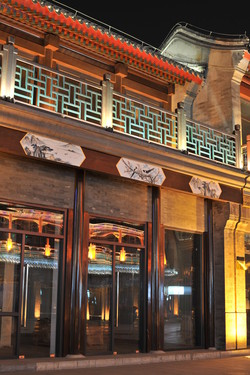
Active D-Lighting employs localized tone management technologies to keep pictures from appearing flat in low-contrast circumstances. Consequently, the proper contrast is maintained while the lost highlights and shadows are recovered. When you press the shutter, Active D-Lighting instantaneously processes all this; the only setting you need to adjust is the amount of ADL used, depending on which alternative you’ve selected.
There are two steps in which ADL works its magic. First, it starts by choosing exposure options that provide a somewhat darker exposure than usual, which helps preserve highlighted details. Second, after you snap your image, the camera brightens the shadow detail in the image’s darkest parts.
Why Use Active D-lighting?
In my experience, the Nikon DSLRs meter will detect the contrast level in the scene when Active D-Lighting is selected. It will then process the final image with the proper correction to lighten up the scene’s shadows. While doing so, Active D-Lighting preserves the highlight detail, which other systems frequently overlook.
The value of Active D-Lighting stems from its ability to sustain highlights while adjusting for shadows.
Additionally, Active D-Lighting has the unique ability to automatically modify mid-tone contrast to improve the image’s overall appearance.
It’s a fantastic combo to open up the shadows (without using a flash), keep the highlights, and alter the mid-tones for an entirely natural-looking shot.
Generally, Active D-lighting:
- Enhances photos with high contrast
- Brings back shadows and highlights elements
- Accentuates the contrast between the image’s dark and light portions
When to Use Active D-lighting?
You should choose the appropriate quantity of active D-lighting depending on the lighting situation you are shooting in.
Generally speaking, you will need to utilize a higher Active D-Lighting setting the more contrasty the light you are working with. If you’re unsure, you can rely on your camera’s Auto mode and allow it to select the ideal amount of ADL depending on your shooting scene.
Active D-Lighting will perform best in demanding lighting conditions, which is valid for scenes with brilliant skies.
Consider the discipline of sports photography. Imagine a football stadium in the afternoon where the sun is on one side, illuminating half of the field and shadows completely covering the other half. With Active D-Lighting, the exposure will be lowered on the pitch’s sunny side and raised in the shadowy regions.
When you consider all that Active D-Lighting can do, you realize there are endless applications for it.
How to Set Up Active D-lighting on Your Nikon?
It is easy to set up ADL on a Nikon camera. Here are three steps to do so:
1. On your Nikon DSLR, open the Shooting menu and scroll down until you find Active D-Lighting.
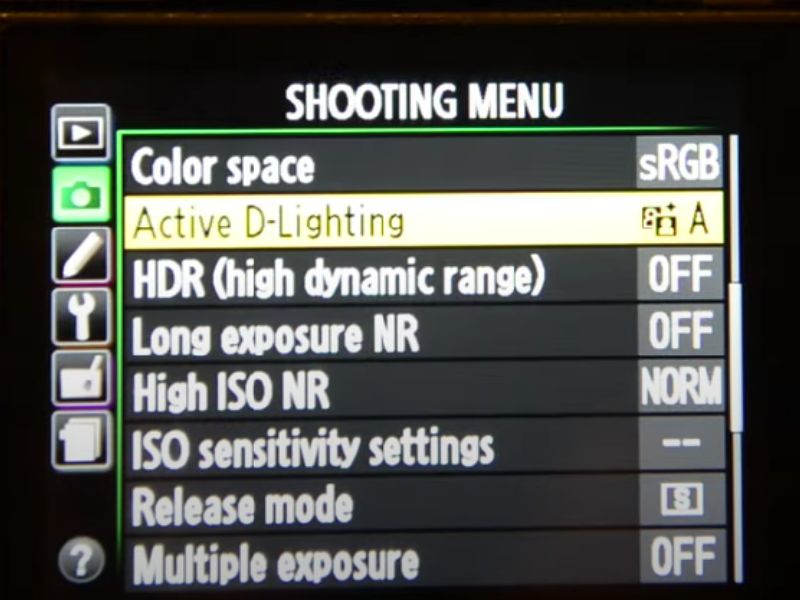
2. When you select this and click OK, a menu of Active D-Lighting choices will appear.
3. Choose your preference (normal, low, high, or auto), then press OK once again.
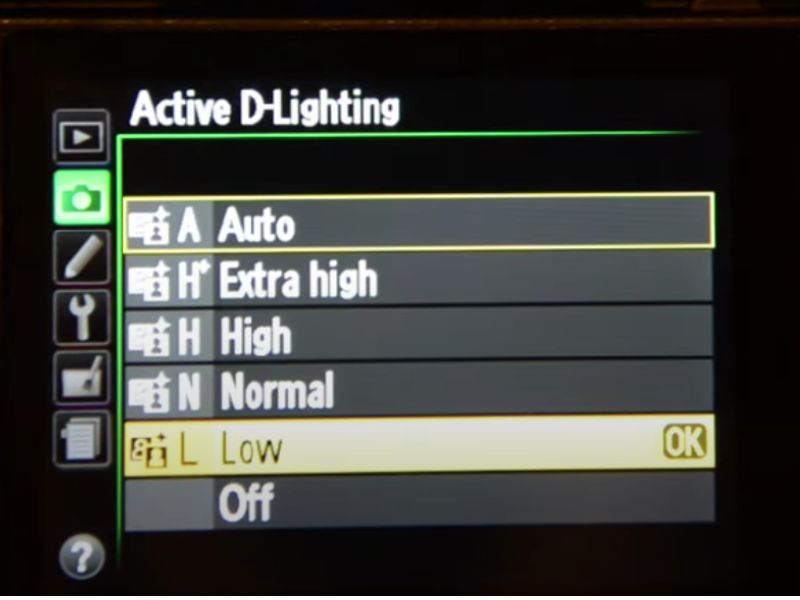
For a setting with a lot of contrast, choose high for a scenario with little contrast, select low. For photographs with moderate contrast, normal or high settings are best.
Use the auto option if you don’t want to continually adjust the settings due to the image’s varying contrast. The camera decides the ideal level of D-Lighting to use with this option.
Active D-lighting vs. HDR
Active D-Lighting retains details in both highlight and dark regions, replicating brightness as you perceive it, even when photographing high-contrast pictures in backlit environments. Because it doesn’t combine two photos like the High Dynamic Range (HDR) feature does, Active D-Lighting is appropriate for shooting moving subjects.
The High Dynamic Range (HDR) feature automatically merges two photographs with different exposures taken with a single shutter release to create a single image with a greater dynamic range. Even in high-contrast shooting situations, this produces photos with a rich tonal gradient in the shadows and highlights.
HDR also employs repeated exposures to provide a more extensive dynamic range (DR) than the sensor can capture in a single photo. It’s best utilized when the sensor’s DR is greater than the scene’s.
Does Active D-Lighting Affect Raw?
No, Active D-Lighting and all other in-camera processing are disabled for RAW photos.
RAW photographs record everything that goes through your camera’s sensor without decompression, denoising, or exposure adjustment. This lets you tweak your photos to change the color, brightness, and white balance later.
Is Active D-Lighting the Same as D-Lighting?
No, Active D-Lighting and D-Lighting are two completely different concepts.
To generate the final image, Nikon Active D-Lighting is functional at the time of exposure and uses the camera settings. On the other hand, D-Lighting uses information from the image’s exposure rather than the camera’s exposure data to adjust.
After saving a picture, you can add D-Lighting to it using the in-camera retouch option. To do so, locate the image you want to change in the camera’s replay. Then tap the ‘i’ icon to access the retouch menu, then select D-Lighting.
Using the arrow keys, select the intensity of D-Lighting you want to use on the screen, from high to low. Most cameras allow you to choose the best option for the image by displaying a before and after view on the screen. When you’re done, click okay or the replay button to go back if you don’t want to implement the changes.
D-lighting does unlock a handful of new options, such as enabling you to enforce the D-Lighting effect only to particular parts of a photo using a Selection control point. It will also instantaneously rectify contrast and brightness across the image sequence and helps reconcile the light and dark zones of the particular image.
Remember that when you opt to activate D-Lighting using the retouch option in-camera, your unedited image version will stay unchanged, and a second sample of the retouched image will be saved. While this eliminates the possibility of accidentally erasing or overwriting your photographs, paying attention to how much card space you use is still essential.
Other Alternatives to Active D-lighting
Here are three alternatives to balance out high contrast in your images.
High Dynamic Range(HDR) Shooting
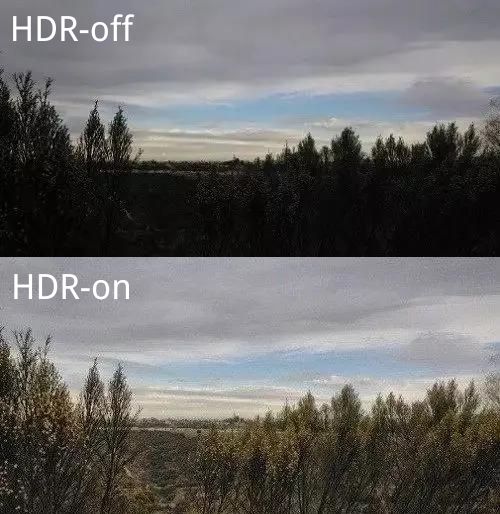
High Dynamic Range(HDR) photography is the process of combining photos to get a final image. The process entails shooting several pictures, which are then sutured together. Different exposures are used to capture the scene in each shot, and when combined, the image offers a generally accurate exposure/contrast.
Typically, at least three photos are required for this approach. The first one involves taking a picture with mid-range exposure. The second meter is used for the brightness, while the third is used for the shadows.
The issue is that HDR photographs are prone to overprocessing. Automated HDR software has a ton of presets, and HDR filters are now accessible as well. When you use more of these, they can create unattractive visuals. Note that the purpose of HDR mode as a technical tool is to increase the dynamic range of your photos.
RAW Shooting
When you shoot in RAW, your sensor is used to its maximum potential without being subjected to post-processing or compression like a JPEG file. This implies that you may carefully manipulate blown highlights and deep shadows in post-production to bring back detail.
Use Custom Tone Curves
With specific cameras, you may design your own unique tone curves to handle challenging lighting situations. Similar to Active-D lighting in principle, with the exception that you may specify how the curve will handle the shadows and highlights. You may make a curve and then dim the too-bright areas in the highlights.
And if you’re shooting with a smartphone that doesn’t support this feature, you can use Lightroom tone curve panels to edit your photos by adjusting the brightness and contrast levels as well.
Bottom Line
When shooting a picture, lighting is essential. There could be a lot of contrast between dark and light parts which frequently causes the image to lose a lot of its finer details, especially if you’re photographing in a lighting-rich location.
Thus, many cameras contain a feature that enhances the contrast in such pictures. These dark and highlight features are extracted by the Active D-lighting feature, ensuring they are visible in the image. You can configure this feature to operate either automatically –auto-sensing the lighting effects– or manually. Even better, some cameras can provide two images: one with Active D-Lighting and the other without, and you’ll decide which one to go with.