To take band promotional photos, start by treating the shoot as a marketing job, not just a portrait session. The photos need to show who the band is, what their music feels like, and where the images will be used: social media, posters, press kits, streaming profiles, and gig announcements. Plan the concept, choose a fitting location, use camera settings that keep every member sharp, light the group intentionally, and direct poses so the band looks confident without feeling stiff. Shoot a variety of crops and arrangements, then edit the final set consistently. Deliver both high-resolution and web-ready files so the band can use them immediately.
What Makes a Good Band Promotional Photo?
A good band promotional photo communicates identity quickly. Someone should be able to glance at the image and get a sense of the band’s style, mood, and professionalism before hearing a song.
That does not mean every photo needs to be dramatic or heavily stylized. A folk duo might need warm, natural portraits in a quiet outdoor space. A punk band may suit harsh flash, alleys, grain, and attitude. An electronic act might need clean lines, colored light, or a futuristic setting.
The key question is: “Would this image make sense next to the band’s music?” If the answer is yes, you are on the right track.
Plan the Shoot Before Anyone Picks up a Camera
Good band promo photos usually come from good planning. Before the shoot, ask the band where the photos will be used. A square crop works well for streaming profiles, vertical images are useful for stories and posters, and horizontal images help with website banners or press features.
Discuss the band’s visual style. Ask for a few reference images, but do not copy them exactly. Look for patterns: dark or bright, polished or raw, serious or playful, urban or natural.
Also confirm practical details: number of members, outfits, location permissions, arrival time, and backup plans for bad weather. If possible, create a short shot list. For example:
- Full band wide shot
- Full band tight portrait
- Individual portraits
- Vertical promo image
- Horizontal banner image
- Casual behind-the-scenes option
Planning keeps the session focused and helps you avoid finishing with one nice image that does not fit the band’s actual needs.
Choose a Location That Matches the Band’s Image
The location should support the band, not compete with them. Simple backgrounds often work best because multiple people already create visual complexity.
Match the location to the music and brand. A metal band might work well in an industrial area, rehearsal room, parking garage, or dark studio. An indie pop band may fit a colorful wall, record shop, rooftop, or clean daylight interior. A singer-songwriter group might suit woods, open fields, old houses, or warm window light.
Check the background before shooting. Watch for signs, trash, bright objects, or poles behind heads. Also think about space: you need enough room to arrange the band, step back, and shoot different crops. A great-looking wall is not useful if you cannot physically frame the group well.
Use Simple Gear and Camera Settings That Keep Everyone Sharp
You do not need expensive gear to take strong band promo photos. A camera with manual or aperture priority mode, one versatile lens, and careful settings are enough to begin.
For group portraits, depth of field matters. If you use a very wide aperture like f/1.8, one member may be sharp while another looks soft, especially if they are standing at different distances from the camera. Start around f/4 to f/5.6 for small groups, and use f/8 if the band is staggered in depth.
A 35mm or 50mm lens works well for many promo shoots. A 24-70mm zoom is even more flexible if you have one. Avoid going too wide unless you want distortion or need an environmental look.
| Situation | Suggested Settings | Why It Helps |
|---|---|---|
| — | —: | — |
| Outdoor daylight group | f/4–f/8, 1/250s, ISO 100–400 | Keeps faces sharp and avoids blur |
| Indoor window light | f/4, 1/125s, ISO 800–1600 | Balances sharpness with available light |
| Flash portrait | f/5.6, 1/160s, ISO 100–400 | Gives clean, controlled group detail |
| Dark moody scene | f/4, 1/125s, higher ISO if needed | Preserves mood while limiting motion blur |
Focus on the eyes of a central band member, then check sharpness on the camera screen.
Light the Band in a Way That Fits the Mood
Lighting should match the band’s sound and image. Soft natural light is flattering and easy for beginners. Open shade, cloudy skies, or window light can make the band look polished without much equipment.
For a more dramatic look, use one off-camera flash or LED light from the side. Side lighting creates shadows and shape, which can work well for rock, metal, hip-hop, or electronic artists. Front flash can create a raw, energetic look, especially for punk or garage bands, but it should feel intentional rather than accidental.
Pay attention to every face. With groups, it is common for one member to fall into darkness or get blocked by another person’s shadow. Take a test photo, zoom in, and check each face. If one person is too dark, adjust their position, move the light, or turn the group slightly.
Pose and Direct the Band Without Making It Awkward
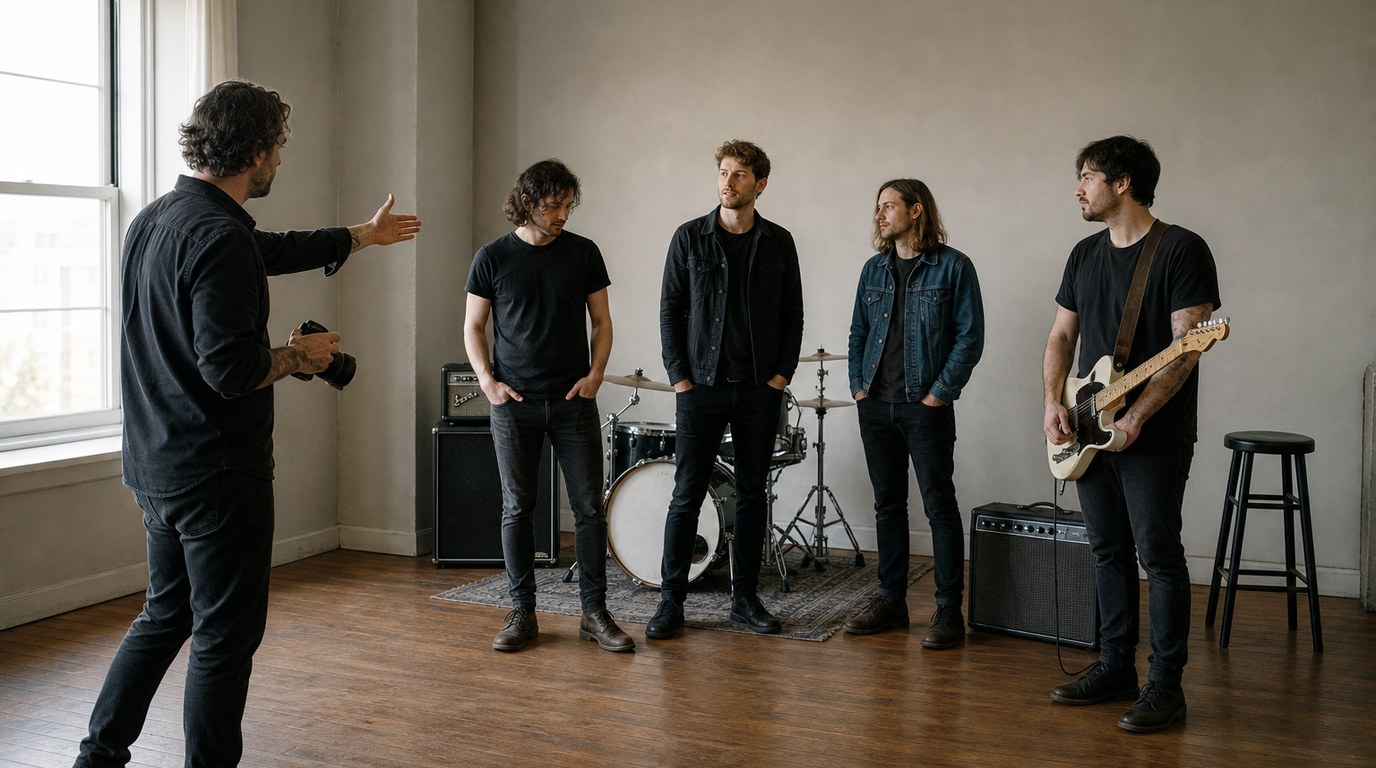
Most bands are not professional models, so your direction needs to be clear and simple. Avoid vague instructions like “act cool.” Instead, give physical directions: “Turn your shoulders slightly toward me,” “Step half a pace forward,” or “Look just past the camera.”
Start with the band standing naturally, then refine the arrangement. Create layers by placing one or two members slightly forward and others slightly back. Avoid lining everyone up flat against a wall unless you want a very direct, poster-like look. Staggering people adds depth and makes the photo more interesting.
Watch hands. Hands in pockets, crossed arms, holding an instrument case, or resting on a jacket can all work. Dangling hands often look awkward. Also check posture: small changes like standing taller, lowering the chin slightly, or shifting weight to one leg can make a big difference.
Give the band something to react to. Ask them to look at each other, walk toward the camera, lean against a wall, or reset between frames. For serious images, keep the energy calm. For fun bands, encourage movement, laughing, or playful interaction.
Shoot several versions of each pose. Someone may blink, look away, or make an odd expression. Groups need more frames than solo portraits because every person has to look good at the same time.
Capture the Right Mix of Promotional Images
A complete band promo shoot should produce variety. Do not stop after one strong group portrait. The band may need different images for different platforms.
Capture horizontal, vertical, and square-friendly compositions. Leave some empty space in a few frames so text can be added for posters or announcements. Shoot tight portraits for profile images and wider environmental shots for websites or press.
Also photograph different moods if the band’s brand allows it: serious, relaxed, energetic, and candid. If members have strong individual personalities, include solo portraits. This gives the band more options for interviews, member announcements, and social media posts.
Edit Band Promo Photos Consistently
Editing should make the set feel cohesive. Choose a color and contrast style that fits the band, then apply it consistently across the final images. A bright pop band might suit clean colors and lighter shadows. A heavier band may work better with deeper contrast, muted tones, or cooler color grading.
Start with basic corrections: exposure, white balance, contrast, cropping, and straightening. Then adjust skin tones carefully. Even if the overall style is moody, faces should still look intentional and usable.
Avoid over-editing. Heavy filters, extreme skin smoothing, crushed shadows, or unnatural colors can make the photos look amateur. If you use grain, blur, or strong color effects, make sure they support the band’s image rather than hide technical problems.
Edit the strongest images first, then match the rest to that look.
Deliver the Final Photos Like a Professional
Deliver files in formats the band can actually use. Provide high-resolution JPEGs for posters, press, and printing, plus smaller web-ready JPEGs for social media and websites. If possible, include both vertical and horizontal options.
Use clear file names, such as BandName_Promo_01_Web.jpg and BandName_Promo_01_HighRes.jpg. This helps the band, manager, or venue find the right files quickly.
Send the images through a gallery, cloud folder, or download link. Include a short note explaining what is included and whether credit is required. Professional delivery makes the experience smoother and increases the chance the band hires you again.
Common Band Promo Photo Mistakes to Avoid

The biggest mistake is focusing only on making a “cool” photo while forgetting its purpose. A promo image must be clear, usable, and connected to the band’s identity.
Avoid these common problems:
- One or more members are out of focus
- The background is distracting
- The band’s clothing clashes unintentionally
- Every image has the same crop
- The lighting does not fit the mood
- The edit is too trendy or inconsistent
- There is no space for text or promotional use
- The group looks stiff because they were not directed
Also avoid overshooting without checking your results. Pause during the session, review sharpness and expressions, and fix problems while everyone is still there.
Simple Band Promo Shoot Workflow
Follow this basic workflow on shoot day:
- Confirm the shot list and intended uses.
- Check the location, background, and light.
- Set your camera for enough depth of field.
- Take a test shot and review every face.
- Start with simple standing poses.
- Add layered arrangements and movement.
- Shoot vertical, horizontal, tight, and wide frames.
- Capture solo or smaller-group portraits if needed.
- Review before wrapping.
- Edit and deliver a consistent final set.
FAQ
What Should a Beginner Know First About How Do I Take Band Promotional Photos?
Start by understanding that band promotional photos are marketing images. They need to show the band clearly, match the music’s mood, and work across different platforms. Plan the concept, location, outfits, lighting, and shot list before the session begins.
What Matters Most When Evaluating How Do I Take Band Promotional Photos?
The most important factors are identity, usability, and technical quality. The photo should feel right for the band, keep every member sharp and visible, and be useful for social media, press kits, posters, streaming profiles, and gig promotion.
What Mistakes Should Readers Avoid with How Do I Take Band Promotional Photos?
Avoid distracting backgrounds, shallow depth of field that makes members blurry, awkward posing, inconsistent editing, and shooting only one crop. Also avoid choosing a location or lighting style just because it looks cool if it does not match the band’s image.
What Is the Next Logical Step After Learning About How Do I Take Band Promotional Photos?
Plan a simple test shoot with a local band or musician. Create a small shot list, choose one location, practice directing the group, and deliver a polished set with vertical, horizontal, tight, and wide images. Then review what worked and improve the next session.