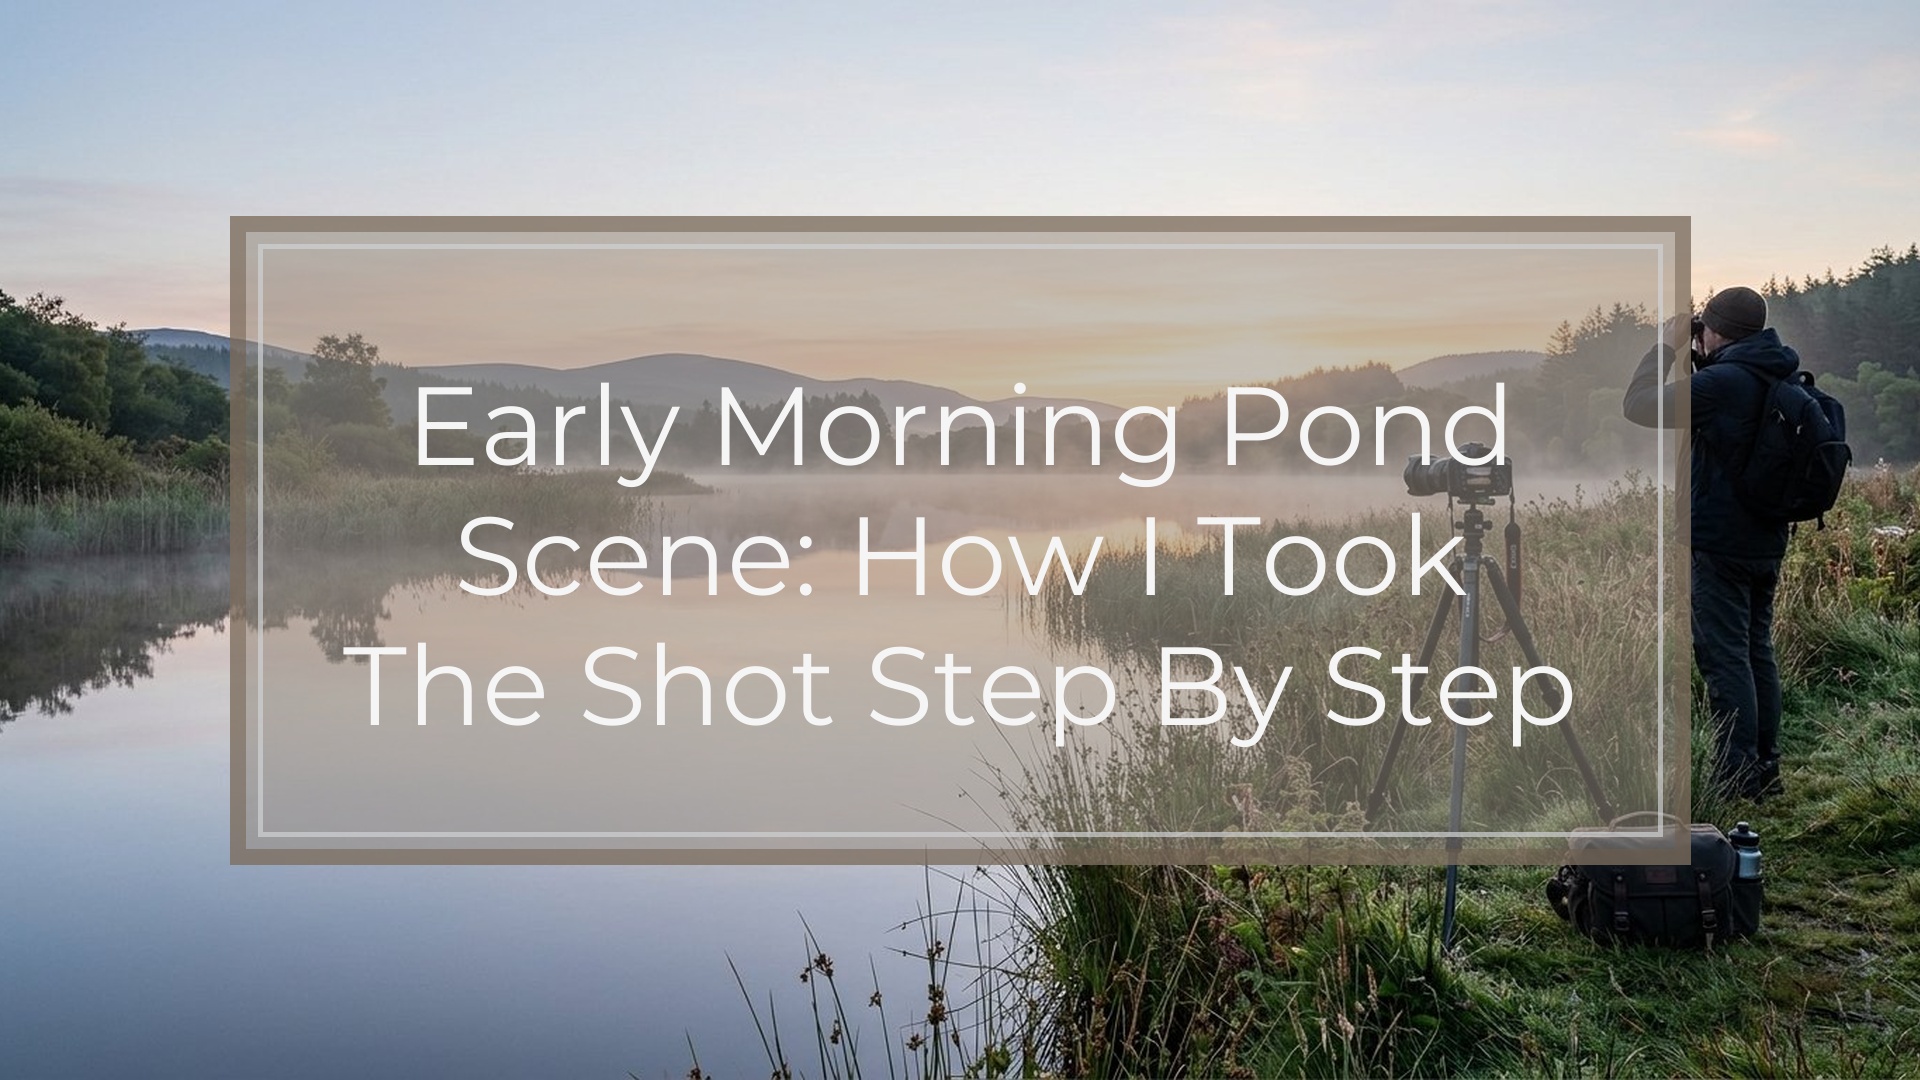
For this early morning pond scene, the goal was simple: keep the reflection clean, protect highlight detail in the sky, and make the image feel quiet rather than dramatic. The repeatable lesson is that pond photos like this are mostly won before the shutter press. I looked for still water, side light, and a shoreline clean enough to support the reflection instead of fighting it. Then I used a low ISO, a mid-range aperture, and a tripod so I could wait for the calmest moments. The final frame came from simplifying the scene and timing the water, not from expensive gear or heavy editing.
The Scene and the Final Goal
I made the photo just after sunrise at a small pond with light mist, soft warm light on the trees, and mostly calm water. The location itself was modest, so the reflection had to carry much of the image. My goal was a balanced frame where the shoreline, tree line, and mirrored shapes all felt connected.
I was not chasing a dramatic sunrise burst. I wanted soft contrast, clear structure, and enough sharpness that the reflection looked intentional. In other words, the priority was mood over spectacle.
What I Noticed Before Taking the Shot
Before touching settings, I read the scene. First, I watched the water. Even slight ripples can weaken a reflection, so I waited through a few brief breezes to see how often the pond settled. That told me timing would matter as much as exposure.
Next, I checked the light direction. The sun was low and slightly off to one side, which gave the trees shape without turning the water into a sheet of glare. I also noticed the sky was much brighter than the bank, so highlight control would matter.
Finally, I studied the frame edges. Pond scenes get messy fast with reeds, sticks, and bright patches of grass. I found one clean section of shoreline and a reflection that lined up well with it. That decided my shooting position.
The Gear I Used and Why It Was Enough
I used a basic mirrorless camera, a standard zoom, and a tripod. The lens was set to a moderate wide angle rather than ultra-wide because I wanted the pond and trees to feel natural, not stretched.
The tripod mattered more than the camera body. It let me keep ISO low, refine the composition, and wait for calmer water without rushing. I did not need a premium lens or a bag full of filters. For a scene like this, patience and stability matter more than expensive gear.
Camera Settings: How I Balanced Sharpness, Light, and Reflection
I started in aperture priority, then switched to manual exposure once the composition was set so each frame stayed consistent while the light changed slowly. My main idea was simple: keep enough depth of field for the shoreline and tree line, preserve the highlights, and avoid adding blur through either camera shake or unnecessary ISO.
| Setting | What I used | Why I used it | What to adjust in similar scenes |
|---|---|---|---|
| — | —: | — | — |
| Aperture | f/8 | Good depth of field without stopping down too far | Use f/11 if you need more depth; stay moderate for best sharpness |
| ISO | 100 | Clean file for shadow recovery and water tones | Raise slightly only if ripples force a faster shutter |
| Shutter speed | About 1/8 to 1/15 sec | Worked with dawn light and calm water on a tripod | Go faster if ripples increase; slower only if the scene stays still |
| Focus | Single point near the shoreline area | Balanced near and far detail | Refocus if you change focal length or move position |
| Release mode | Self-timer or remote | Reduced vibration | Use any hands-off trigger if available |
| File type | RAW | Better control of highlights and subtle tones | Strongly recommended for dawn scenes |
I checked exposure by watching the brightest sky and its reflection, not just the darker land. In pond photography, exposure is partly about brightness, but it is also about keeping small tonal differences between sky, shore, and water intact.
How I Composed the Frame

Composition was mostly subtraction. I moved left and right until the shoreline formed a cleaner base and the reflection of the lit trees became easier to read as a shape. The pond had plenty in it, but not everything improved the image.
I tried giving more emphasis to the land at first, but the reflection was the real subject, so a near-balanced split worked better. In this case, the quiet symmetry added calm instead of feeling static.
I also paid attention to the corners. One pale patch of grass kept pulling my eye, so I shifted position rather than planning to crop it out later. That is a useful field habit: fix distractions in camera whenever possible.
The Shot Sequence: What I Tried Before Landing on the Best Frame
My first frames were wider, with more shoreline and more sky. They described the place, but they weakened the reflection by making it only one element among many.
Next, I lowered the tripod a bit and tightened the frame. That gave the water more importance, but one version put the horizon so centrally that the image felt stiff rather than calm.
The best frame came after two small changes: I waited for a smoother patch of water and moved sideways just enough to clean up clutter along the bank. I then shot several nearly identical frames as the ripples changed. The winner came from better timing and cleaner composition, not from a dramatic settings change.
The Biggest Challenges and How I Solved Them
The hardest problem was changing water texture. Even when the pond looked still, faint ripples kept softening the reflection. I solved that by slowing down and taking single frames during the calmest pauses.
The second problem was dynamic range. The sky was brighter than the bank, and both the direct view and the reflection had to hold together. I protected highlights first and accepted that I would lift darker areas later.
The third problem was clutter. Pond edges are rarely neat, so I improved the frame by moving my feet instead of relying on a heavy crop.
Editing the Photo Without Losing the Early Morning Mood

My edit was light. I made a small exposure adjustment, recovered highlights in the sky, and lifted shadows gently along the shoreline. I did not try to make every part of the frame equally bright because that would flatten the dawn mood.
I added a little warmth to match the sunrise color, then used mild clarity on the trees while keeping the water softer. After that, I cleaned a few tiny edge distractions and applied modest sharpening. I avoided heavy saturation and aggressive contrast because those edits would have fought the quiet feeling that made the scene work.
What I Would Repeat Next Time and What I Would Change
I would absolutely repeat the slow approach: study the water first, simplify the edges, and wait for the best reflection instead of shooting constantly. That part worked.
Next time, I would arrive a little earlier and test a slightly longer focal length. A tighter crop might strengthen the reflected tree shapes even more. I would also bracket a few frames earlier in case the sky brightened faster than expected. The big lesson is that this photo succeeded through observation and small adjustments, not one magic setting.
FAQ
What Camera Settings Are Best for an Early Morning Pond Photo?
A strong starting point is ISO 100, f/8 to f/11, and a tripod. Let shutter speed fall where the light requires, often somewhere between 1/4 and 1/30 second in soft dawn conditions. Then adjust based on ripple movement, brightness, and how much depth of field you need.
Should I Use a Polarizing Filter for Pond Reflections?
Use one carefully. A polarizer can reduce glare, but it can also weaken the reflection you may actually want. If the reflection is the subject, take a frame with and without the filter before deciding. Use it only when glare is hiding detail you care about more than the mirror effect.
How Do I Keep Both the Shoreline and Reflection Sharp?
Use a tripod, choose a moderate aperture such as f/8 or f/11, and focus into the scene rather than on the nearest edge. Also remember that apparent softness often comes from moving water, not bad focus, so wait for calmer moments before shooting.
What Should I Do If the Water Is Not Perfectly Still?
Do not assume the photo is ruined. Wait through short lulls in the breeze and take several frames as the surface changes. If the reflection never fully settles, change the goal: use the broken reflection and water texture as part of the design instead of forcing perfect symmetry.