Silhouette photography is simple once you understand the core idea: expose for the bright background, not for your subject. Put your subject in front of a much brighter light source, keep the subject’s shape clean and easy to recognize, and let the subject fall dark. The best silhouettes usually happen at sunrise, sunset, or in front of bright windows, skies, or reflective water. Start by choosing a strong outline, placing your light behind it, and dialing exposure down until the subject goes nearly black. Then refine the shot with good spacing, a low angle, and uncluttered framing so the shape reads instantly.
What Makes a Good Silhouette Photo
A good silhouette photo depends on three things working together: a bright background, a dark subject, and a shape the viewer can recognize immediately.
The background needs to be brighter than the subject by a noticeable amount. That difference is what creates the silhouette effect. A sunset sky, a bright doorway, or light reflecting off water can all work well.
The subject should be mostly dark, often completely black. Unlike many portraits, you are not trying to show facial detail or texture. You are using shape as the main subject.
Most importantly, the outline has to read clearly. A person standing sideways with arms separated from the body usually works better than someone facing the camera with everything blending together. Silhouettes are less about detail and more about clean visual storytelling.
What You Need Before You Start
You do not need special gear to shoot silhouettes. Any camera that lets you control exposure can do it, including most phones.
A basic setup can be:
- A camera or smartphone
- A subject with a strong, clear shape
- A bright background, ideally low sun or open sky
- Optional tripod if light is low
A lens with a normal to short telephoto view can help simplify the frame, but it is not essential. What matters more is where you stand, where the light is, and how you expose the scene. For beginners, silhouette photography is one of the best ways to practice light and composition without needing expensive equipment.
How to Photograph Silhouettes Step by Step
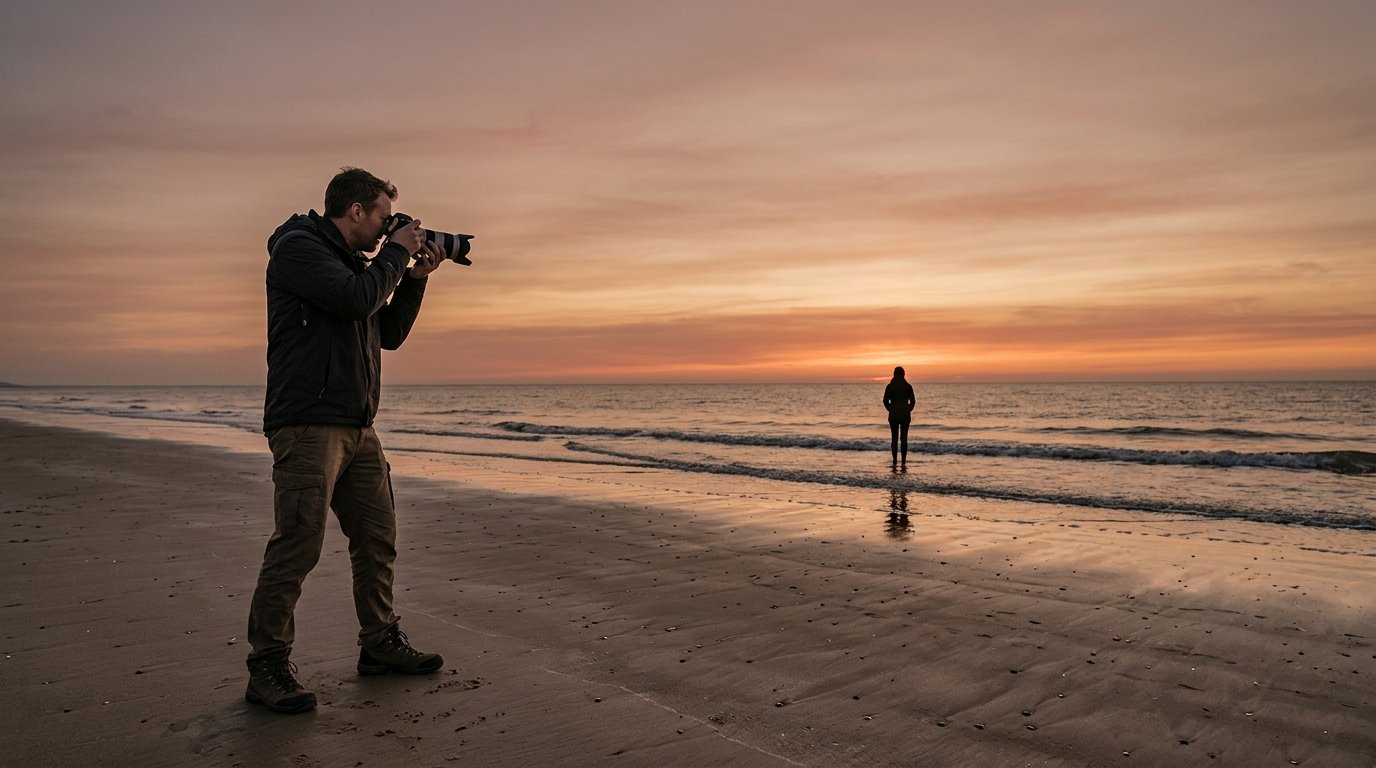
Start by finding backlight. The light source should be behind your subject, not lighting the front. Sunrise and sunset are the easiest times because the sky is bright, colorful, and low in the frame. You can also use a bright window, a doorway, or even headlights in some creative situations.
Next, choose a subject with a clear outline. People, cyclists, trees, pets, buildings, and boats work well. Avoid subjects whose shapes become confusing when dark. If you are photographing a person, ask them to turn sideways, separate their arms or legs slightly, or hold a recognizable pose.
Then position yourself so the bright background sits directly behind the subject. Changing your angle by just a few steps can make a major difference. Often, shooting from a lower position helps isolate the subject against the sky instead of mixing it with darker objects in the background.
Now set exposure for the bright area of the scene. If you shoot in auto and tap on the brightest part of the sky, many cameras will naturally darken the subject. If that is not enough, use negative exposure compensation to make the frame darker. On manual settings, increase shutter speed, lower ISO, or close the aperture until the subject turns dark.
Take a test shot and check the result. The subject does not always need to be pure black, but it should look intentionally dark, with little or no detail. If you can still see too much on the subject, reduce exposure more.
After exposure looks right, refine the composition. Watch the edges of the subject carefully. Make sure limbs, heads, or important details are not merging into trees, poles, or other subjects. Small changes in pose or camera position can clean up the outline fast.
Finally, shoot several variations. Try horizontal and vertical framing, different subject distances, and moments of movement. A walking person, a jumping child, or a bird with open wings often creates a more striking silhouette than a static pose. Silhouettes are simple in principle, but the strongest image usually comes from small adjustments rather than one quick frame.
Best Camera Settings for Silhouette Photography
Silhouette settings are less about one exact formula and more about controlling exposure so the background keeps detail while the subject goes dark. If you are new, Aperture Priority or Program mode with exposure compensation is often easiest. If you are comfortable with Manual mode, that gives you the most consistency.
Use the lowest practical ISO first, usually ISO 100 or 200 in good light. This protects image quality and gives you room to adjust shutter speed and aperture.
Choose an aperture based on your subject and scene. Around f/5.6 to f/8 is a strong starting point for single subjects and general outdoor silhouettes. If you want more depth of field in a landscape silhouette, try f/8 to f/11. For a softer background, you can open wider if your subject outline still stays sharp.
Shutter speed depends on available light and whether the subject is moving. Keep it fast enough to avoid blur unless motion is part of the idea.
| Situation | Starting settings |
|---|---|
| Sunset portrait silhouette | ISO 100, f/5.6, 1/500 sec |
| Walking or jumping subject | ISO 100, f/5.6, 1/1000 sec |
| Landscape silhouette | ISO 100, f/8, 1/250 sec |
| Indoor window silhouette | ISO 200, f/4 to f/5.6, 1/125 sec |
Meter for the bright background, not the subject. Spot metering on the sky near your subject can work well, but evaluative or matrix metering also works if you use exposure compensation. A good starting point is -1 to -3 EV depending on how bright the background is and how dark you want the subject.
If autofocus struggles in backlight, focus on the edge of the subject where contrast is strongest, or switch to manual focus.
How to Compose a Silhouette so the Subject Reads Clearly
Composition matters even more in silhouettes because detail is removed. The shape has to carry the whole image.
Look for separation. If a person’s arms are pressed against their body, the silhouette may become one dark block. A step forward, bent knee, raised hat, or side profile usually reads better. With couples, leave a small gap between heads or bodies unless you want them to merge intentionally.
Keep the background simple. A clean sky is easier to read than a busy mix of trees, signs, and buildings. Before pressing the shutter, check the outline against the background from top to bottom.
Use negative space on purpose. Leaving empty sky around the subject can make the silhouette feel stronger and more dramatic. Centering can work, but off-center framing often feels more dynamic, especially if the subject is moving.
Also watch the horizon line. Do not let it cut awkwardly through a person’s neck or head. Raise or lower your camera so important parts of the silhouette stay distinct.
Common Silhouette Mistakes and How to Fix Them
The most common mistake is not making the subject dark enough. If your subject still shows lots of detail, the image may just look underlit rather than like a silhouette. Fix this by exposing for the brightest background area and reducing exposure further.
Another frequent problem is choosing the wrong subject. A silhouette needs a recognizable outline. If the viewer cannot tell what they are looking at, try a different pose, angle, or subject.
Busy backgrounds also ruin silhouettes. Branches, poles, parked cars, and clutter can merge into the subject and confuse the shape. Move a few feet, shoot lower, or reframe against cleaner sky.
Blur can be an issue in low light, especially at sunset. Raise ISO slightly or use a faster shutter speed if your subject is moving. A tripod helps only if the subject is still.
Finally, many beginners focus only on darkness and forget emotion or timing. A silhouette of someone standing stiffly may be technically correct but visually weak. Wait for a gesture, stride, jump, or interaction that gives the shape more life.
Editing Silhouette Photos Without Losing the Effect

Editing should strengthen the silhouette, not bring detail back into the subject.
Start with basic exposure adjustments. Lower highlights only if the sky is too harsh, but keep enough brightness and color for contrast. Increase contrast slightly to deepen the separation between subject and background.
Use blacks or shadows carefully. Pulling shadows down can make the silhouette cleaner. But avoid lifting shadows too much, or you will undo the effect and reveal muddy detail.
White balance can help the mood. Warmer tones usually enhance sunrise and sunset silhouettes, while cooler tones can suit urban or moody scenes.
A small crop can improve clarity by removing distractions near the edges. Sharpen lightly, especially around the silhouette outline. The final image should feel bold and simple, not overprocessed.
Silhouette Photo Ideas to Practice
Practice with subjects that have obvious shapes and easy backlight.
Try these ideas:
- A person walking along a beach at sunset
- A child jumping with arms raised
- A cyclist crossing a ridge line
- A tree standing alone against the sky
- A couple facing each other in profile
- A pet sitting in front of a bright doorway
- Birds on a wire at sunrise
- A skyline or church steeple after sunset
Start with still subjects first, then move to people and action. The more you practice seeing outlines instead of detail, the faster silhouette photography will click.
FAQ
Should Silhouette Photos Be Underexposed?
Yes, intentionally to a point. You usually underexpose relative to the subject so it goes dark, but you are really exposing correctly for the bright background. The goal is not a muddy dark frame, but a bright background with a clean, nearly black subject.
What Metering Mode Is Best for Silhouette Photography?
Spot metering on the bright sky near your subject is often the most precise. But matrix or evaluative metering also works if you add negative exposure compensation. The key is the same either way: meter for the background, not for the shadowed subject.
Can You Shoot Silhouettes with a Phone Camera?
Yes. Tap on the bright background to set exposure, then drag the exposure control down if your phone allows it. A clean outline and strong backlight matter more than the device. Many great silhouette photos come from phones at sunrise or sunset.
What Is the Best Time of Day to Photograph Silhouettes?
Sunrise and sunset are usually best because the light is low, directional, and colorful, with a bright sky behind darker subjects. Blue hour can also work for city shapes. Midday is harder, though silhouettes are still possible with windows, doorways, or strong reflected light.